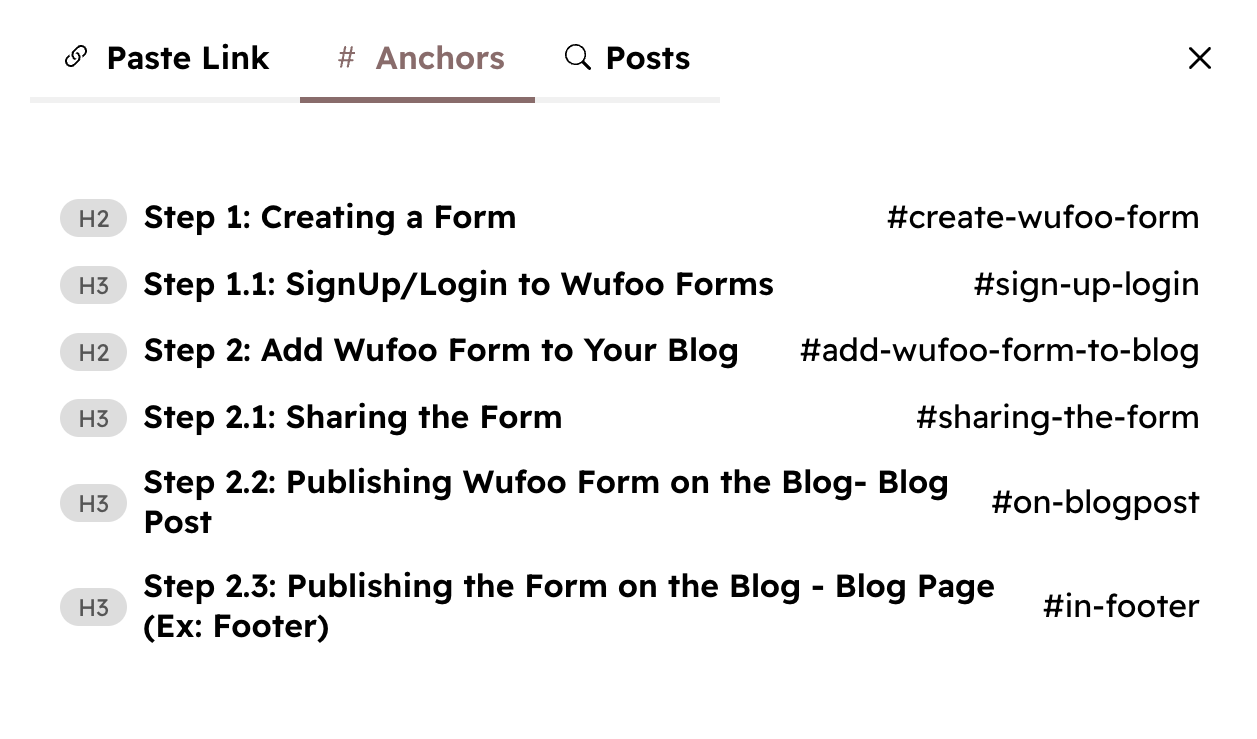
Anchor list contains all the headlines of your content showing whether they have IDs or not.
Writing
Let's learn how to use the Hyvor Blogs Editor and publish your first post!
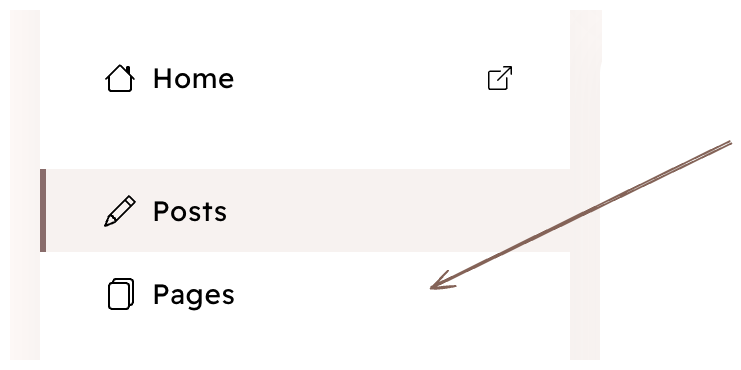
Posts & Pages
Hyvor Blogs supports two types of content: posts and pages. In most cases, you will be using posts. Pages are used for static content like About, Contact, etc.
Posts:
- are the main part of your blog, where you share your ideas, thoughts, and stories.
- appear in the index page or other collection pages
- can be created, edited, and deleted at Console → Posts
- have authors and tags
Pages:
- contain static information
- do not appear in the index page.
- usually is linked to in header or footer navigations.
- can create, edit, and delete pages at Console → Pages
- do not have authors or tags
Both:
- are uniquely identified by the slug
- by default have
/{slug}permalink. See this if you want to change post/page permalinks, for example to include year and month in the URL.
Editor
Hyvor Blogs comes with a rich text editor that supports inline styles and blocks.
Inline Styles
To add inline styles to text, select the text. A popup will be shown with the available options. Click on the inline style you want to add. The following inline styles are supported.
- Bold
- Italic
- Strikethrough
- Inline Code

Links
Adding & Removing Links
Adding links is similar to adding inline styles. Select the text you want to link and then click the Link icon. Next, paste the URL in the input and hit Enter.
To remove a link, select the text and click on the delete icon.
Links with Anchors
To add anchor links easily, follow the steps below.
- Select the text you want to link and click on the link icon
- Click on "Anchors"
- Choose the anchor and click on it
💡
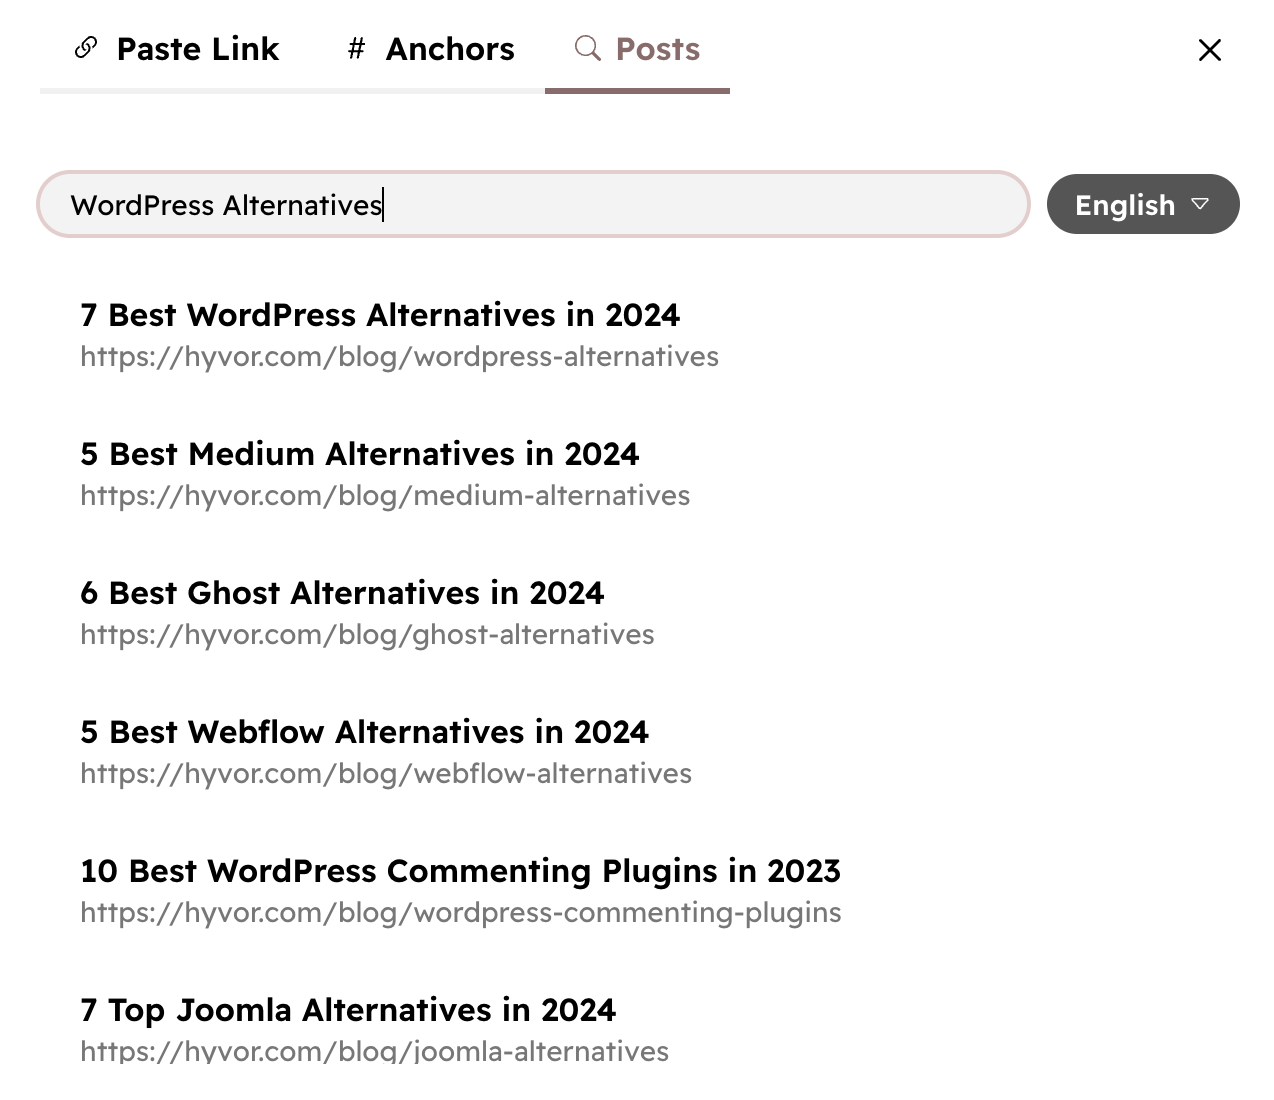
Linking Posts
To link to a post of the same blog, follow these steps.
- Select the text you want to link and click on the link icon
- Click on "Posts"
- Search for the post by typing the title, and click on it
Markdown for Inline Styles
You can also use Markdown shortcuts to create inline styles.
Inline Style
Markdown Shortcut
[Anchor](https://example.com)Bold
**text**Italic
*text*~~text~~Superscript
^text^Subscript
~text~Blocks
The term "blocks" is used to refer to block-like elements you can add to posts, such as paragraphs
and blockquotes. Paragraphs are the basic blocks. You can create a paragraph by pressing Enter anywhere inside the editor.
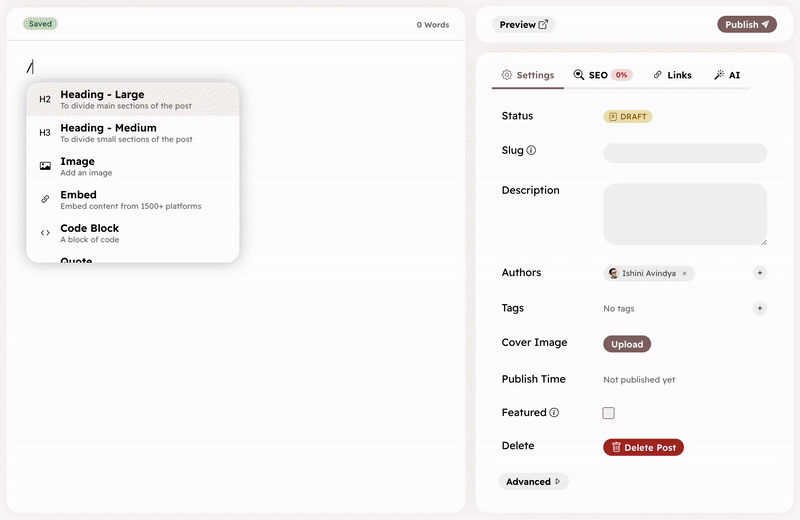
To add other blocks, use the slash command: type slash (/) in a new line to open the
blocks list. Use the mouse or up/down arrows to navigate through the list.

Hyvor Blogs supports the following blocks.
- Paragraph
- Divider
- Heading
- Lists
- Quote
- Callout
- Image
- Embed
- Link Bookmark
- Code Block
- Custom HTML/Twig
Headings
HB supports headings from <h1> to <h6>. The slash command only
provides two options: Large (h2) and Medium (h3). Other headings can be added using Markdown
syntax in a new line.
#+spaceforh1##+spaceforh2###+spaceforh3- ...
Please note that the reason to give Large Heading uses <h2>is that <h1> is reserved for the post title in your theme. However, you may use h1 within
your posts if needed.
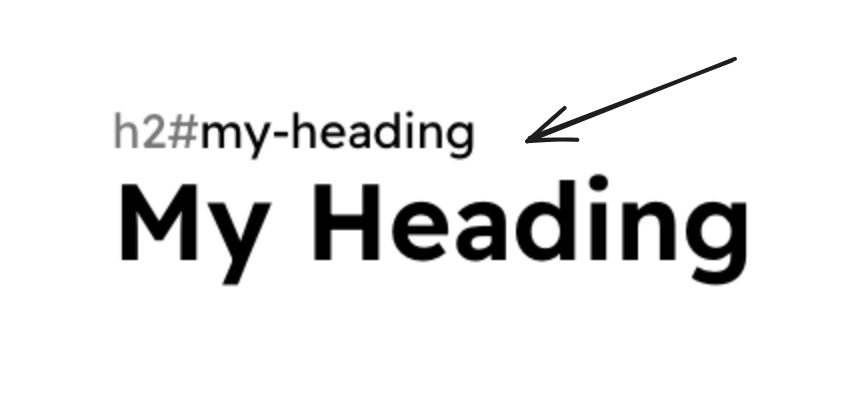
Heading IDs
There are two ways to add heading IDs.
- Focus the ID input at the top of the heading and type the ID there.
- Type Markdown-style heading ID (
{#heading-id}) at the end of the heading.

Lists
Action
Command
Create unordered list
* + space or - + spaceCreate ordered list
1. + space, 2. + space,etc.New list item
EnterDecrease indent
Shift + TabIncrease indent
Tab
Quote
Quote block is usually used to quote something, while it is also generally used make text stand
out. You can create a Quote block via the slash command or by entering > + space in a new line (Markdown syntax).
You can get out of the Quote block by clicking Enter in a new line within the Quote block.
Callout
Callout block is used to write text that stands out from other content in the post. You can set an emoji and background/font colors for each callout block.
Image
To add images, use slash command (/ in a
new line), and choose Image. You can add an image in one of the following ways:
- Upload from your device
- Upload from a URL
- Choose from Unsplash
- Choose from Media Library

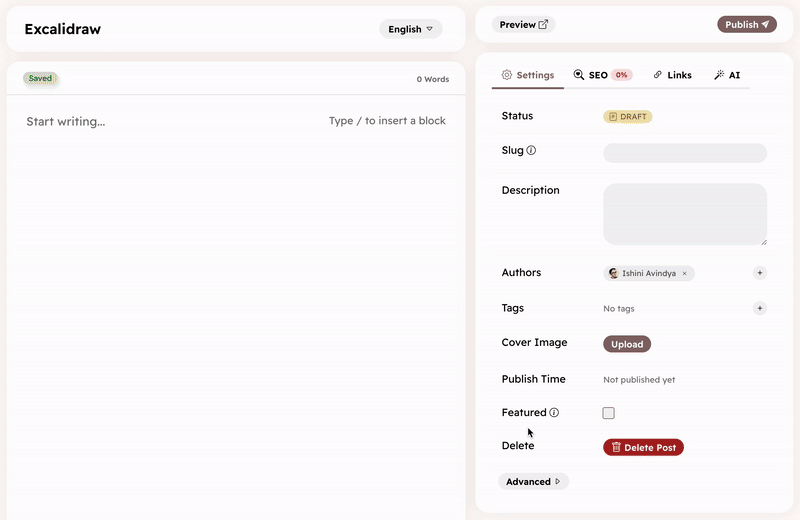
Excalidraw
Excalidraw is a tool to create diagrams and drawings. You can add Excalidraw drawings/editings in your posts.
For uploads, max file size is 50MB. The following formats are supported.
- PNG -
.png - JPEG -
.jpg,.jpeg,.jfif,.pjpeg,.pjp - GIF -
.gif - APNG -
.apng - AVIF -
.avif - SVG -
.svg - WebP -
.webp
Image uploaded from device or a URL are automatically added to your media ensuring their availability without depending on an external service. However, images added via Unsplash are hosted at unsplash.com and not uploaded to blog media.
The image node also allows you to:
- Add a caption
- Add ALT text
- Scale the image
Embed
Hyvor Blogs supports embedding content from Youtube, Twitter, Instagram, Facebook, and other
platforms. Hyvor Unfold is used under the
hood to support various platforms. You can add an embed using the slash command (/ in a new line → Embed). Then, paste the URL you would like to embed in the
input box.

See supported platforms.
Link Bookmark
You can use Link Bookmark block to add a rich link previews to your posts. To insert a link
bookmark, type / in a new line → Link Bookmark. Then, paste the URL you would
like to embed in the input box and press Enter. Hyvor Blogs will generate a rich preview of the
link using OG tags and other metadata.
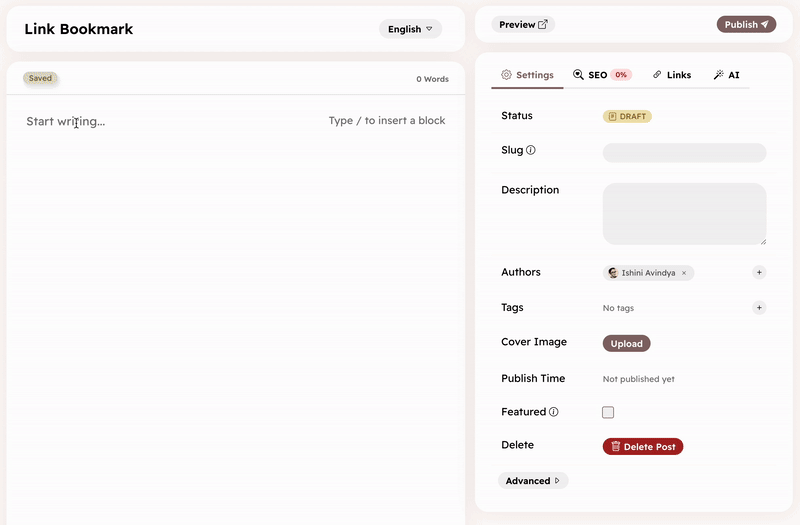
The URL you enter should be publicly accessible to generate a preview. For example, you cannot generate link bookmarks for private social media posts.
Code Block
You can add code blocks in two ways:
/in a new line → Code Block- Type
```langor```js(with language code) in a new line and pressEnter
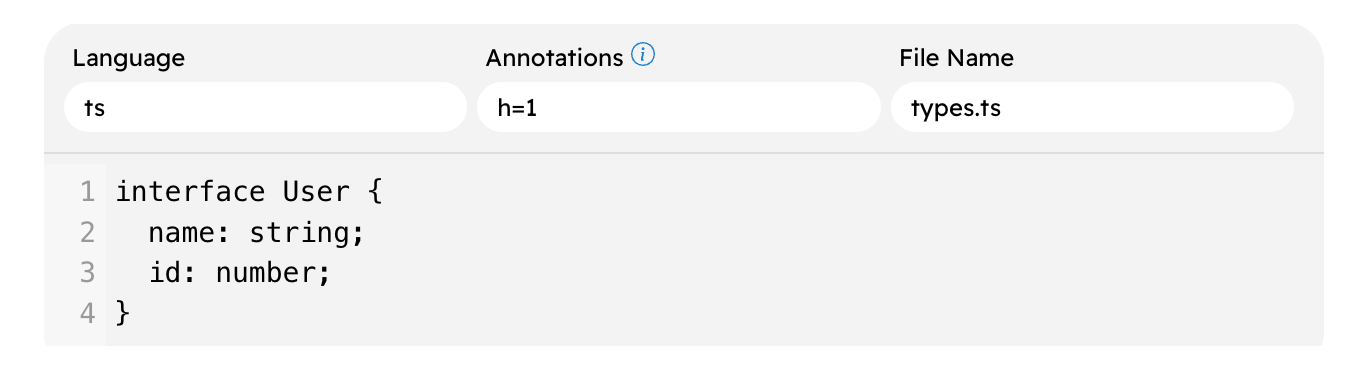
See Syntax Highlighting to learn more about supported languages, supported themes, and using annotations.
Custom HTML/Twig
The Custom HTML/Twig block allows you to add custom HTML or Twig code to your posts. You can use this to add custom elements to your posts. For example, you can add a custom form, a custom widget, etc. You can use Twigvariables in the code.
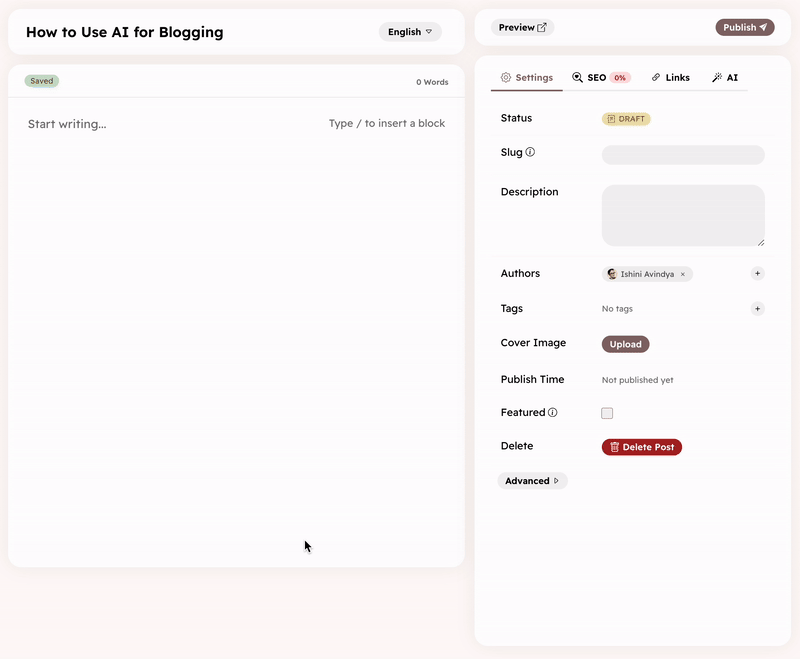
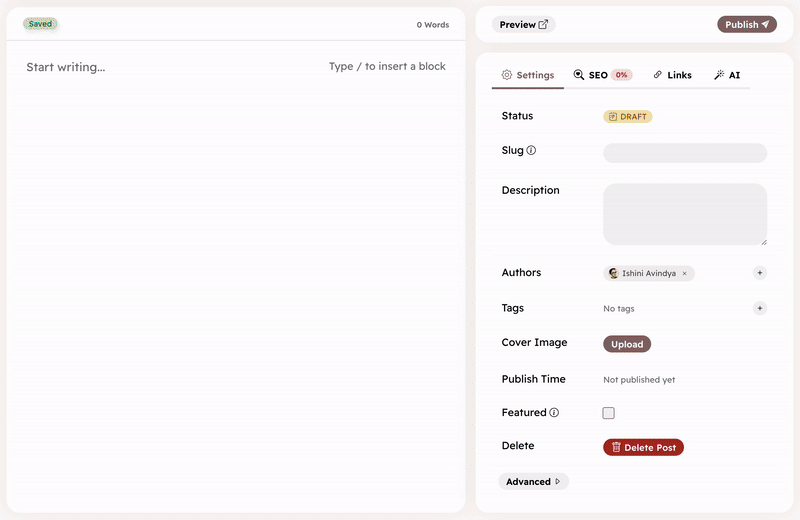
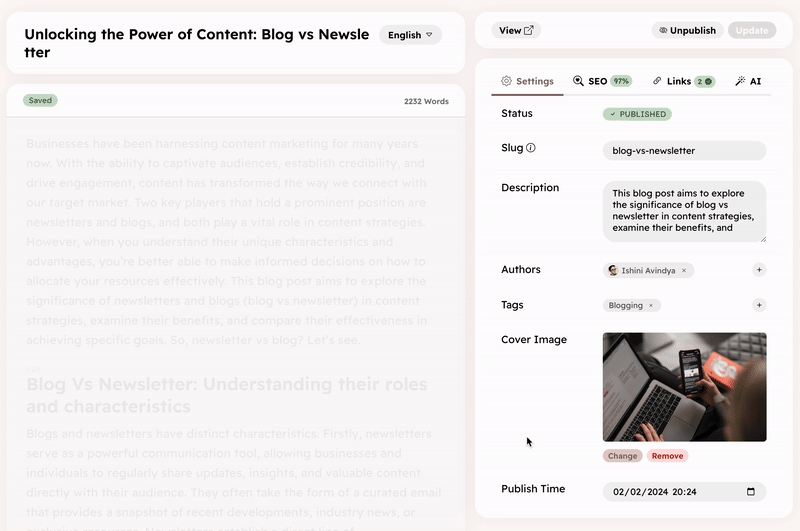
Post Metadata
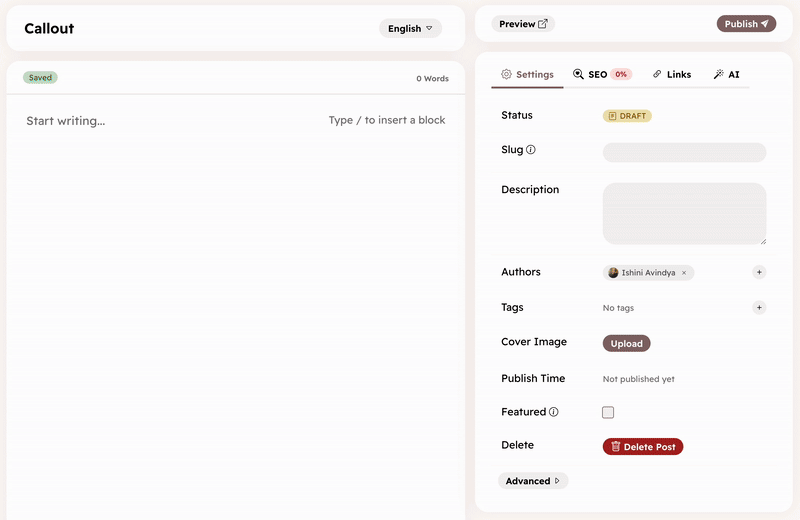
Click the Settings button in the editor to open the post settings.
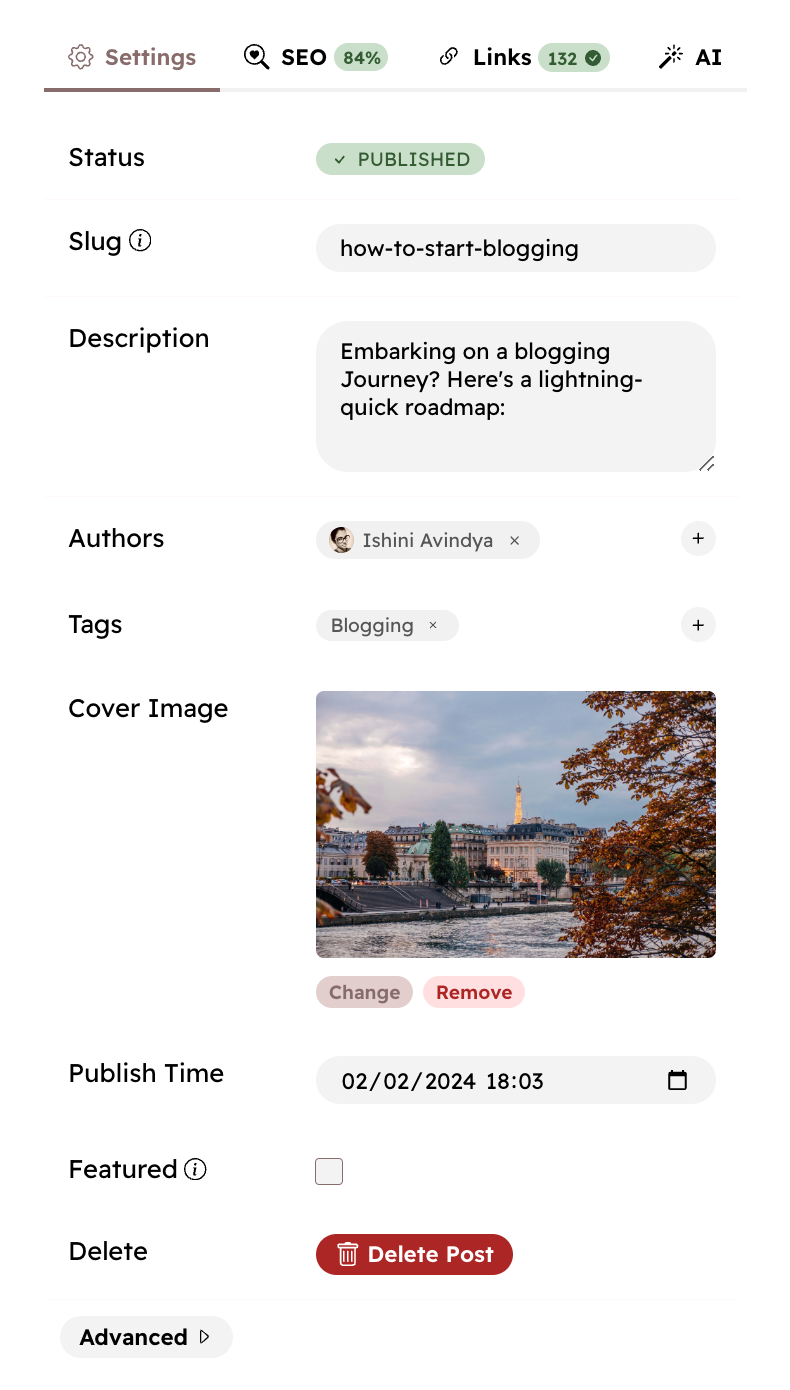
You can configure the following settings for a post:
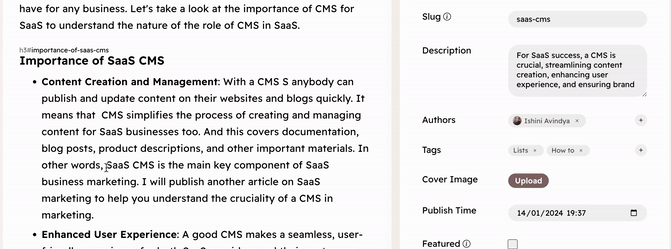
- Slug - A unique URL-friendly identifier for the post. If you don't set a slug, Hyvor Blogs will automatically generate one based on the post title when publishing the post.
- Publish Time - The publish time will be added automatically when publishing the post. However, you can set a custom publish time for a post.
- Authors - You can add users in your blog as authors of a post. By default, the post creator is added as an author of a post. Users with editor-level permissions can add or remove authors of a post. One post can have multiple authors.
- Tags - You can assign one or more tags to a post.
- Description - A short description of the post. This will be used as the meta description of the post for search engines and social media.
- Featured Image - The featured image of the post. This will be used as the meta image of the post for search engines and social media.
In advanced settings, you can add the following:
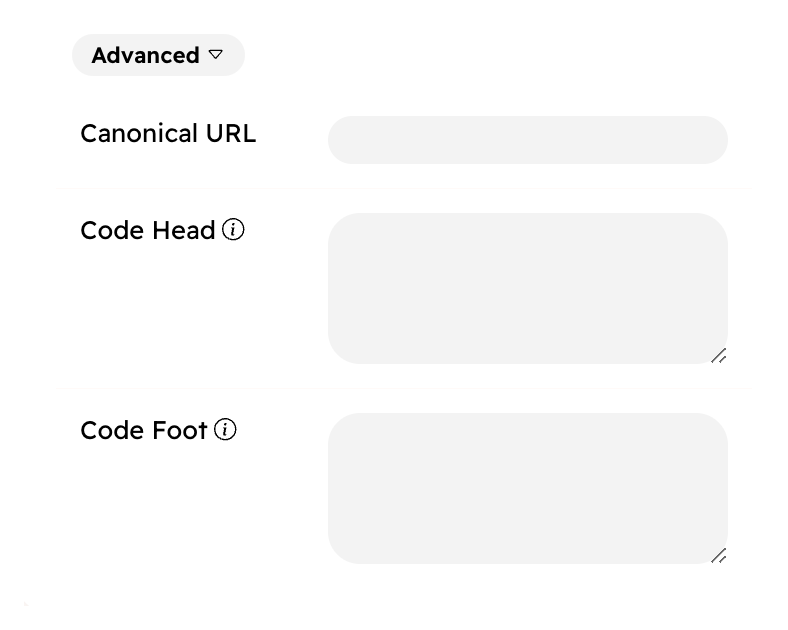
- Canonical URL - If you have published the same post on a different location, you can add the canonical URL of the post here.
- Code Head - Custom code to add right before the
</head>tag of the post. - Code Foot - Custom code to add right before the
</body>tag of the post.
See custom code documentation for more information on different ways of adding custom code to your blog.
Post Status
A post can have one of the following statuses:
- Draft - Not visible to the public. Only users of your blog can see the post in the Console.
- Scheduled - Not visible to the public. It will be published automatically at the specified time.
- Published - Visible to the public.
Publishing
Once you have finished writing your post, you can publish it. Once published, the post will appear publicly on your blog.
Post → Publish
Scheduling
You can also schedule the post at a specific date and time. Hyvor Blogs will automatically publish your post at the specified time.
Post → Publish → Publish Later → Schedule
Unpublishing
You can unpublish a published post. The post's status will be change to Draft. Therefore, it will no longer appear on the blog. You can re-publish it later.
Post → Unpublish
Deleting
You can also permanently delete a post. Note that there is no way to restore a post after deleting. Consider Unpublishing if just want to hide the post from your blog.
Post → Settings → Delete Post
Other Guides
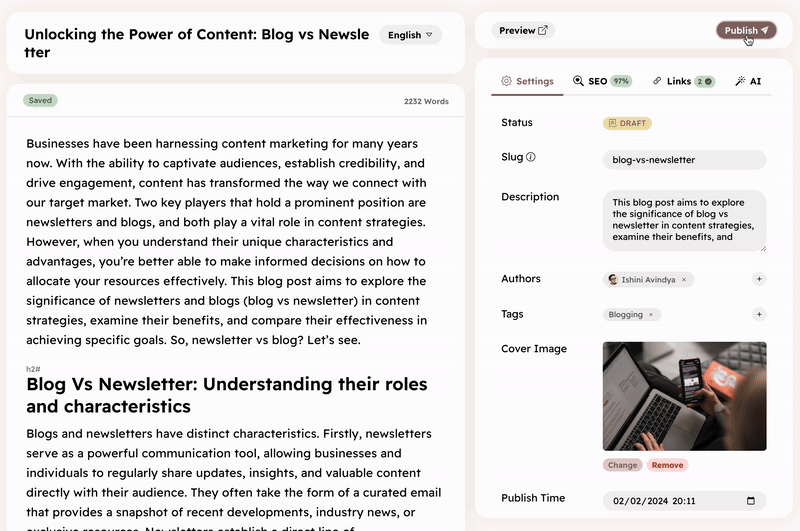
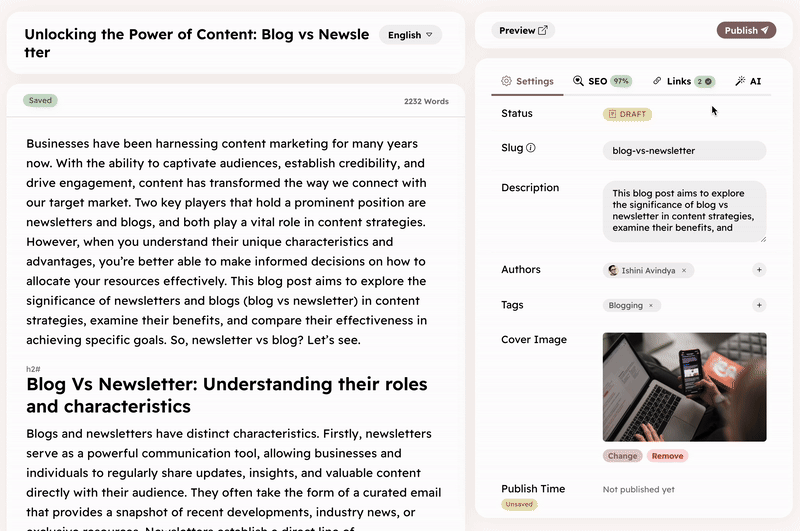
Auto-saving & Post History
If you are editing a draft, Hyvor Blogs will automatically save your post every 15 seconds if any post data (content or metadata) has been edited. You can also manually save your post by pressing Ctrl + S. Check the bottom right corner of the editor to see the status of the auto-saving.

If the content is edited, a post history will be created. You can refer back to this history if you want to revert to a previous version of your post. A single post can have up to 25 post histories.
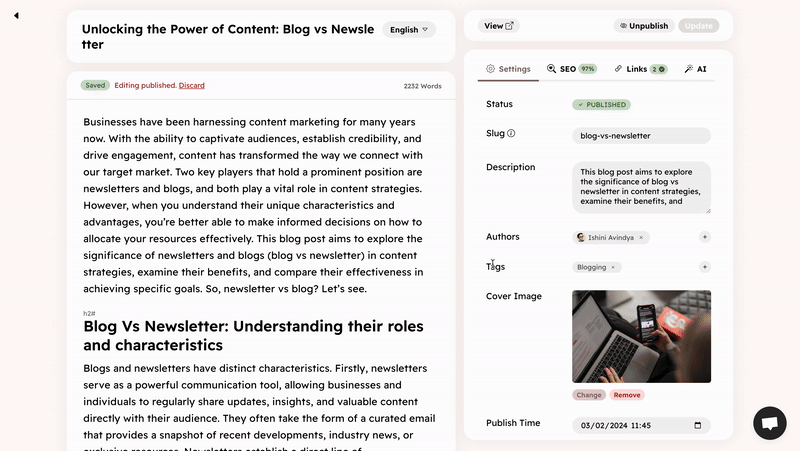
Editing a published post
You can make changes to a published post content at any time. However, the changes will not be visible to the public until you publish the changes.
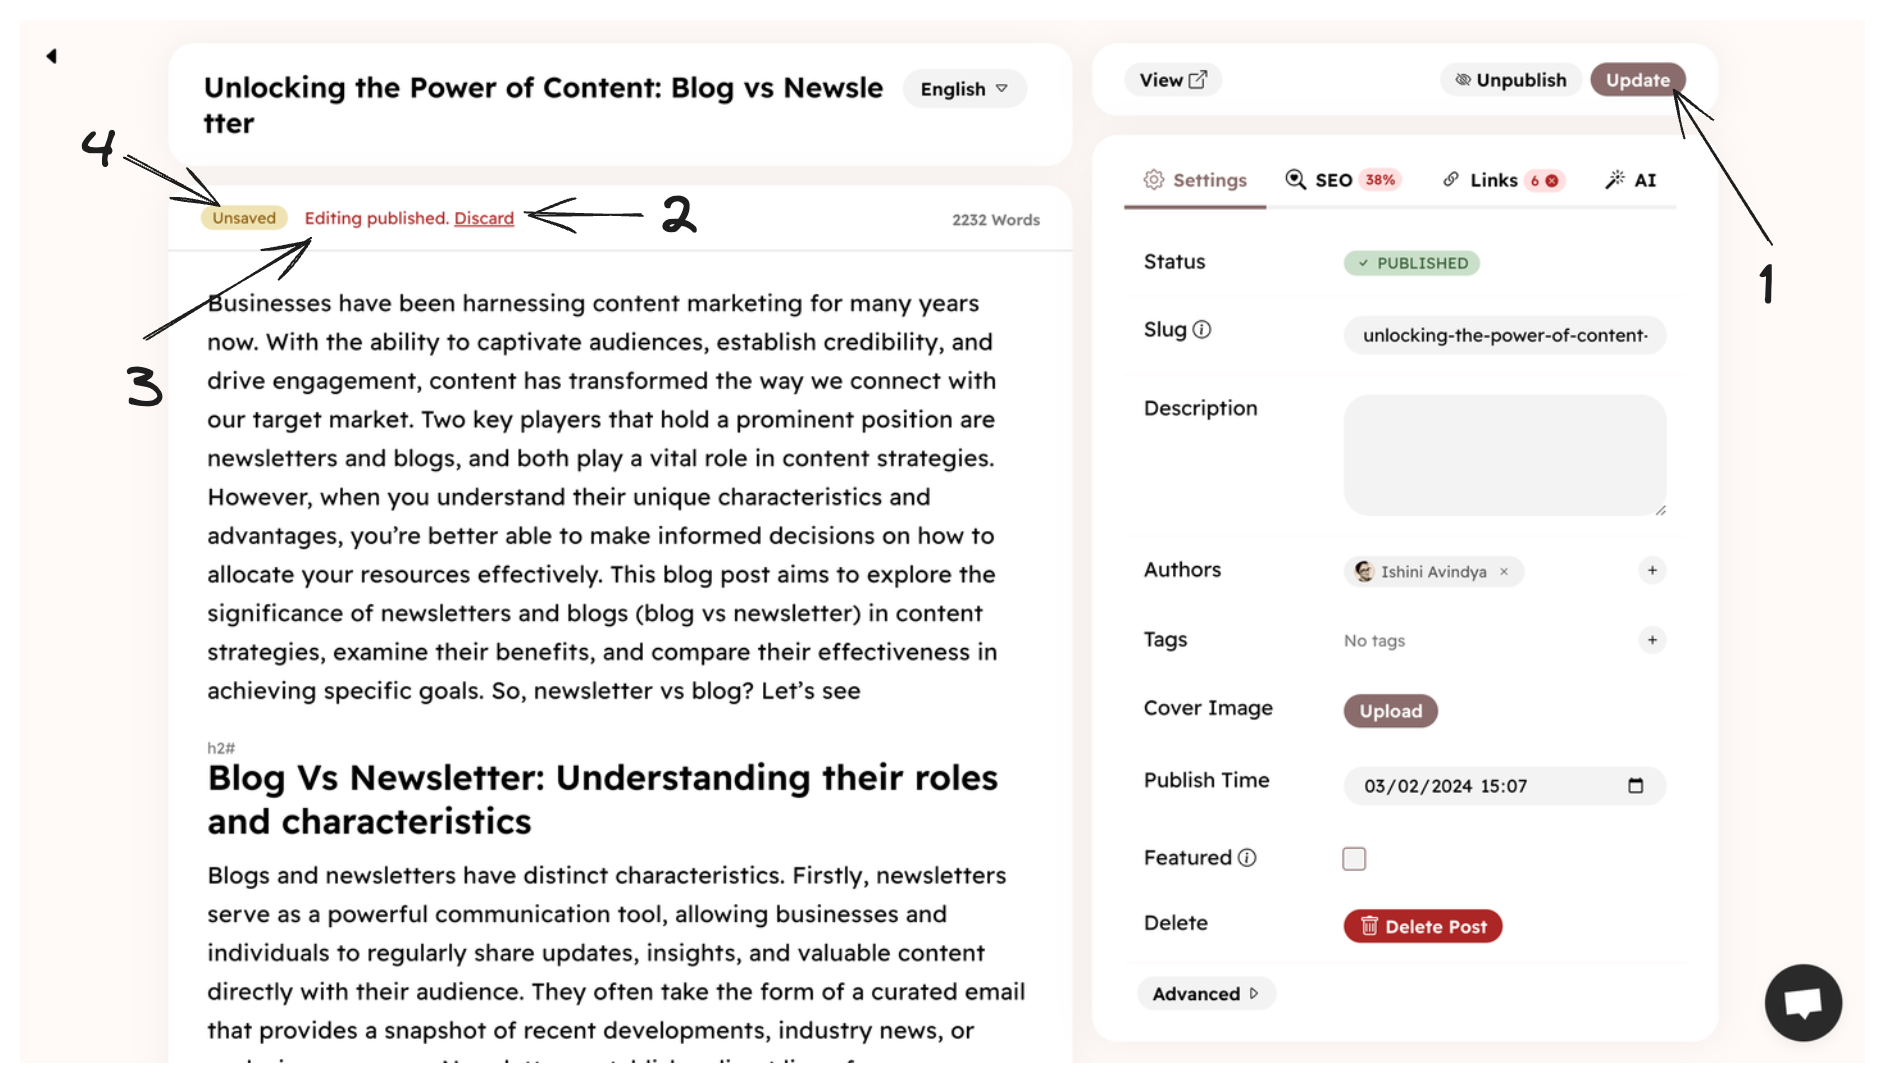
- Update - Publish the changes to the post. The post will be updated immediately.
- Discard - Discard the changes and revert to the published version of the post.
- Editing published - This message will be shown if you are editing a published post.
- This message can be one of these:
- Unsaved - The changes you have made to the post are not saved yet. Press Ctrl + S to save the changes. Or, it will be saved automatically in 15 seconds.
- Saved - All changes are saved
Note that metadata changes will be saved immediately and will be visible to the public.
Multi-language posts
If you have set up multiple languages for your blog, you will see the language codes at the top of the post editor. Click on a language code to switch to that language variant of the post. Each variant should be published separately. See our languages guide, which explains everything you need to know about publishing multi-language posts.
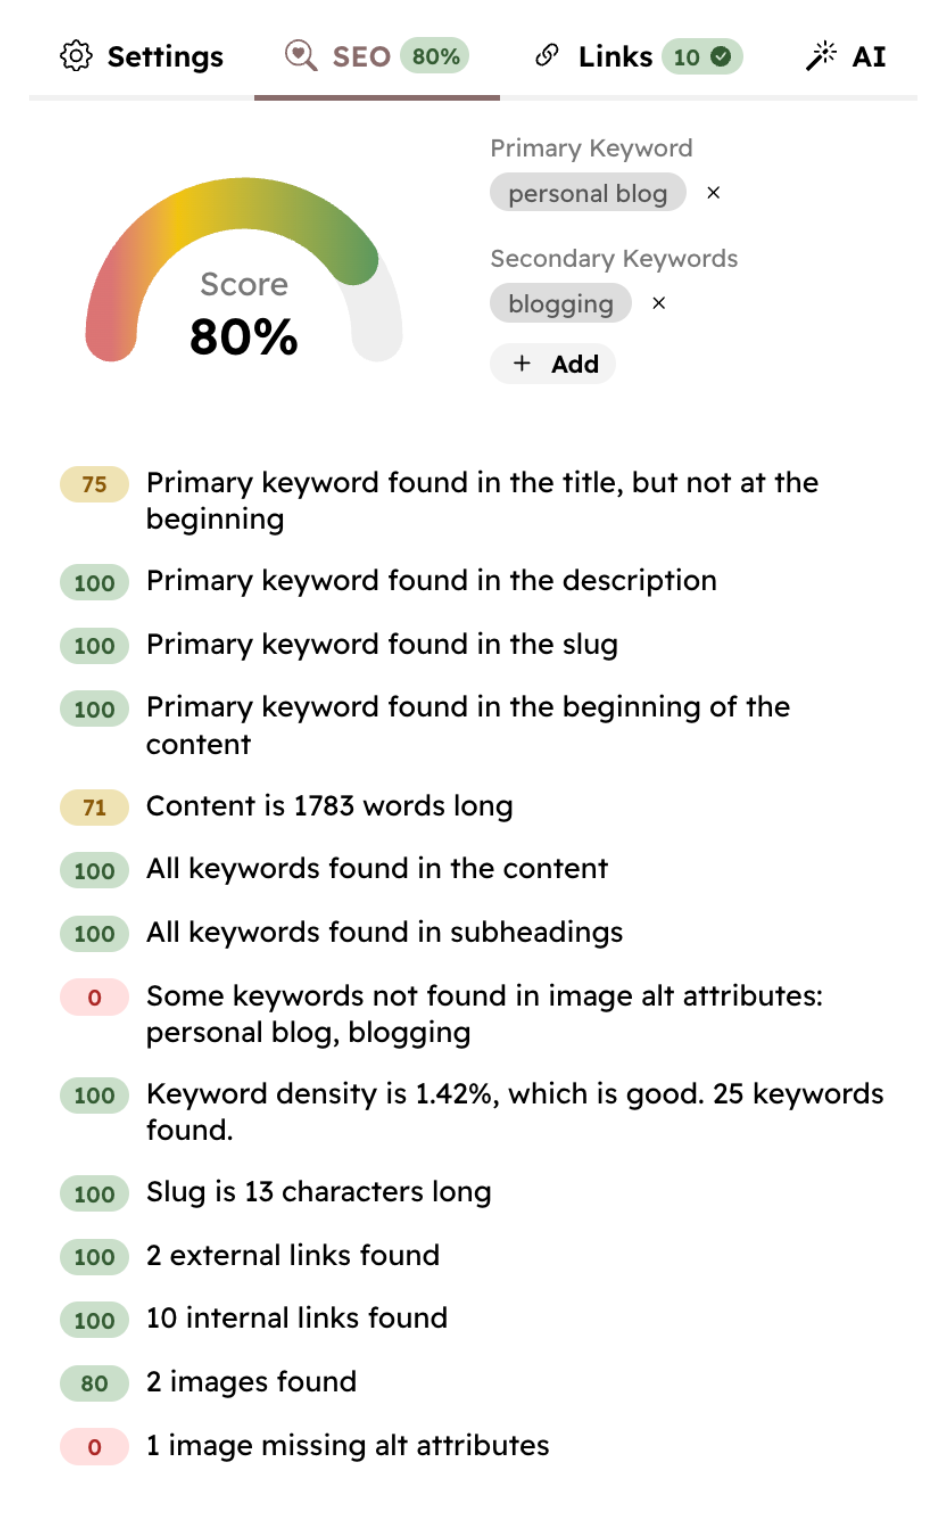
SEO Analysis
The SEO analysis tool in the post editor will give you suggestions to improve your post's SEO. It works based on pre-defined rules, inspired by the Rank Math WordPress plugin.
Important!
SEO analysis is merely a suggestion. Getting a higher score alone will not make your posts rank high. There are also other factors that affect your SEO, such as backlinks, domain authority, etc. However, these suggestions will help you better optimize your content for search engines.
To start analyzing your post, add a primary keyword for your post. You can also add secondary keywords. Hyvor Blogs will then analyze your post content and metadata and give you suggestions in real-time to improve SEO for your post.
These are the tests that Hyvor Blogs will run on your post:
- Primary keyword in the title
- 100% if the primary keyword is at the beginning of the title
- 75% if the primary keyword is in the first 50 characters of the title
- 49% if the primary keyword is after the first 50 characters of the title
- 0% if the primary keyword is not in the title
- Primary keyword in the description
- Primary keyword in the slug
- 100% if the slug matches exactly
blogging-platforms - 75% if the slug contains
blogging-platformswith other words - Primary keyword in the beginning of the content
- Content length
- 0% for less than 400 words
- 1% for each 25 words after 400 words (2500+ words = 100%)
- All keywords in the content
- All keywords in subheadings
- All keywords in image alt attributes
- Keyword density
- 0% for less than 0.1%
- 50% for 0.1% to 0.5%
- 100% for 0.5% to 2.5%
- 50% for 2.5% to 5%
- 0% for more than 5%
- Slug length
- External links
- Internal links
- Images
- 70% - 1 image
- 80% - 2 images
- 90% - 3 images
- 100% - 4 or more images
- All images have alt attributes
If the primary keyword is blogging platforms, we check for blogging-platforms in the slug. It is recommended to set a short slug with hyphens. In this case, the score
will be:
If your content is longer than 300 words, the primary keyword should be in the first 10% of the content. If it is shorter than 300 words, it should be somewhere in the content.
(The best content length depends on the topic, which is not considered here)
All keywords should be present in the post content.
Each keyword should be present in at least one subheading (h2, h3, h4, h5, h6).
Each keyword should be present in at least one image alt attribute.
Checks for keyword density in content (keywords count / total words).
Shorter slugs are better. This test will pass if the slug is less than 50 characters.
At least one external link should be present in the post.
At least one internal link should be present in the post. Links to any subdomain of your main
domain will be considered as internal links. See link types for more information. internal-blog, internal-domain, and internal-root-domain links are considered as internal links.
All images should have alt attributes
Link Analysis
The link analysis tool in the post editor analyzes the status of the links in your post as you write. It will show you a warning if there are any broken, risky, or redirect links in your post. It also shows you the type of each link.
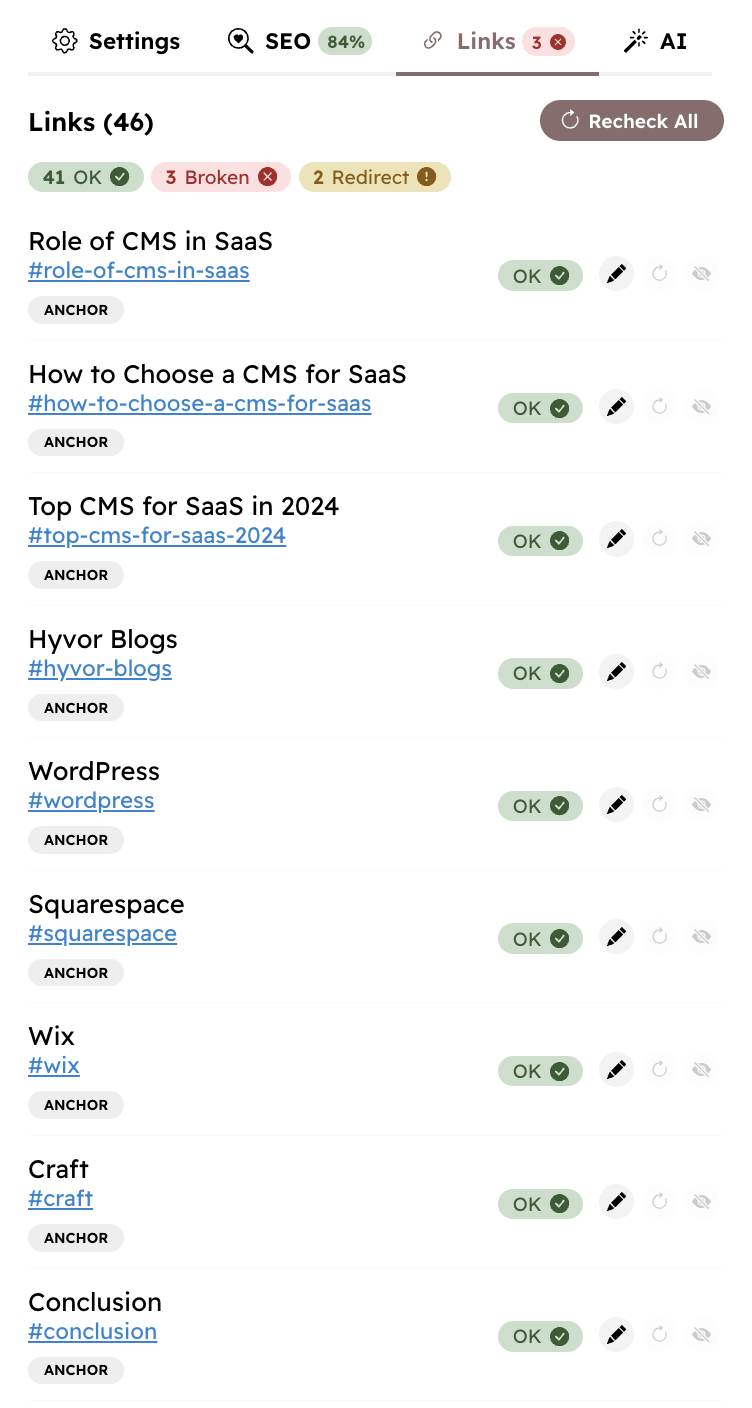
Link Types
Hyvor Blogs categorizes links into the following types.
Link Type
Description
internal-blogLinks to other posts/pages in your blog
internal-domainLinks to the same domain as your blog, but not to your blog
internal-root-domainLinks to any domain of the root domain, but not to your blog's domain
externalLinks to other domains
mailMailto links (starts with
mailto:)telTel links (starts with
tel:)anchorLinks to anchors in the same page (starts with
#)otherOther links (
ftp:, data:, javascript, etc.)Go to Console → Tools → Link Analysis to
- see an overview of all links in your blog
- view results of bi-weekly link analysis
- change email report settings
Link Analysis Accuracy
Our link analyzer is simple: it sends HTTP requests via curl to check the status of the links. This approach allows for a fast and accurate analysis. However, some servers and firewalls may block these requests, which may result in false positives. If you find a link that is marked as broken but is actually working, you can click the ignore button to ignore the link in future analyses.
GPT Writing
We have integrated GPT 3.5 directly into the editor to help you with AI content generation tasks such as
- Generating a blog outline
- Writing a blog post
- Writing an article
- and more...
You can use the default prompts in most cases. However, you can also customize the prompts to get better results.