Requirements:
- a Mailchimp account
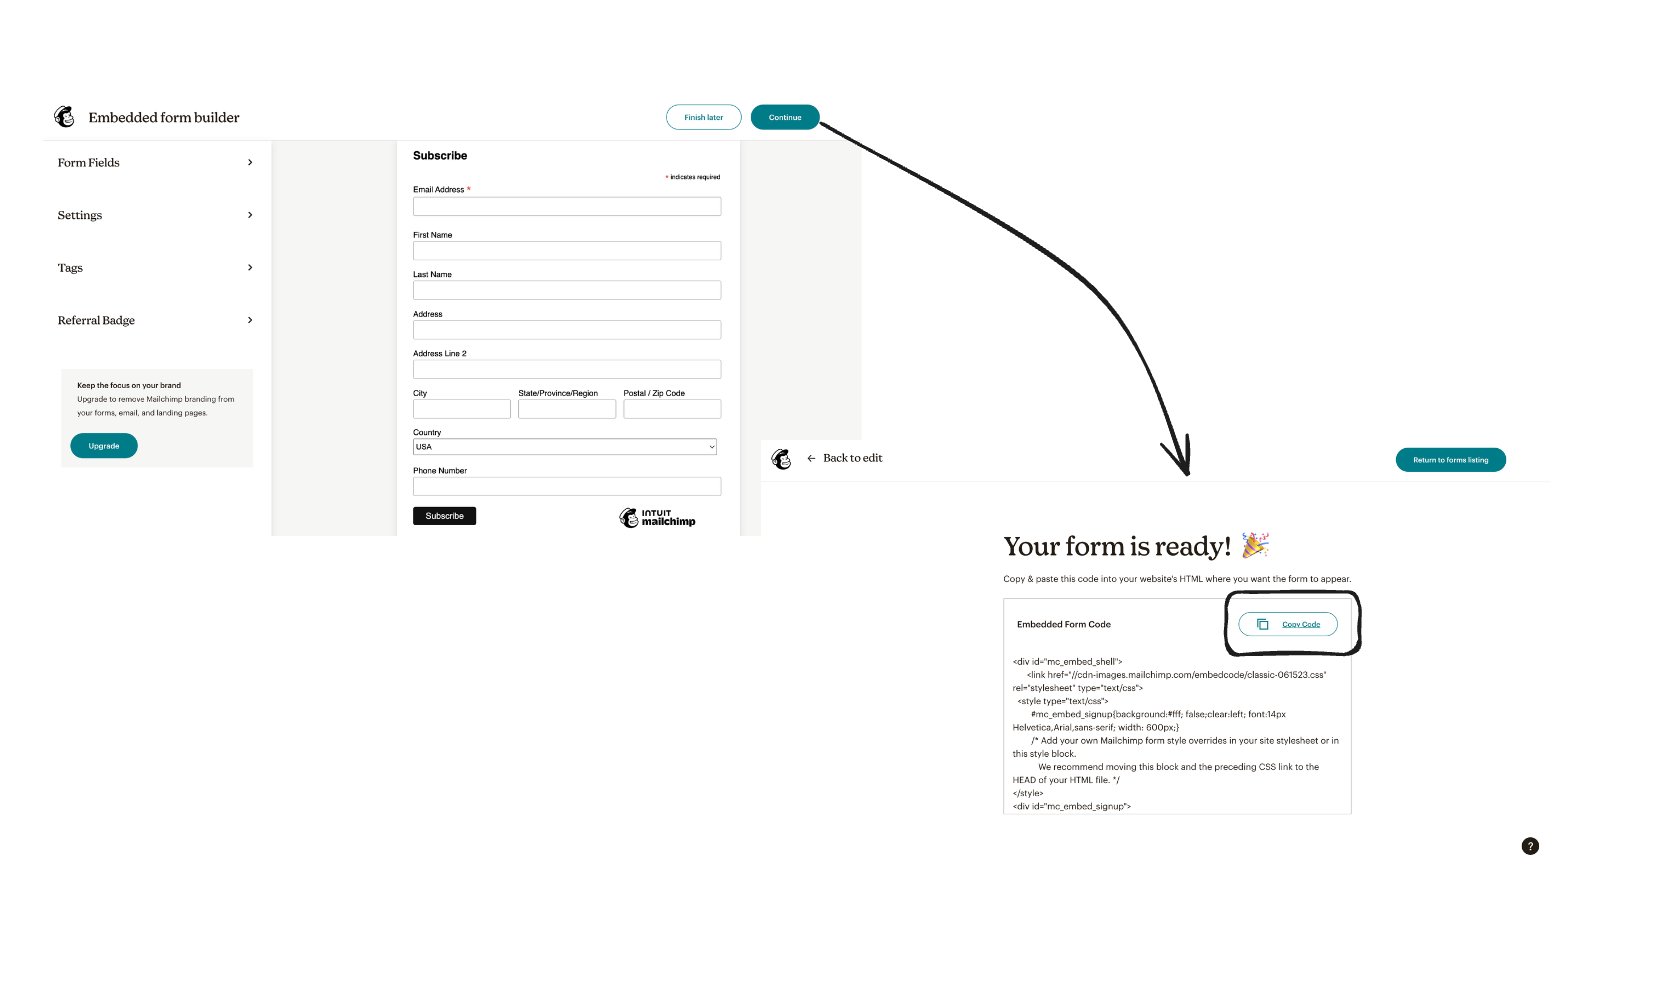
- a form created using Mailchimp
- a blog on Hyvor Blogs
 +
+ Requirements:
If you do not have completed any of the above, refer this documentation (by Mailchimp) to complete all of them.
Go to your blog URL and check whether the newsletter sign up form is integrated correctly. It should look like this.
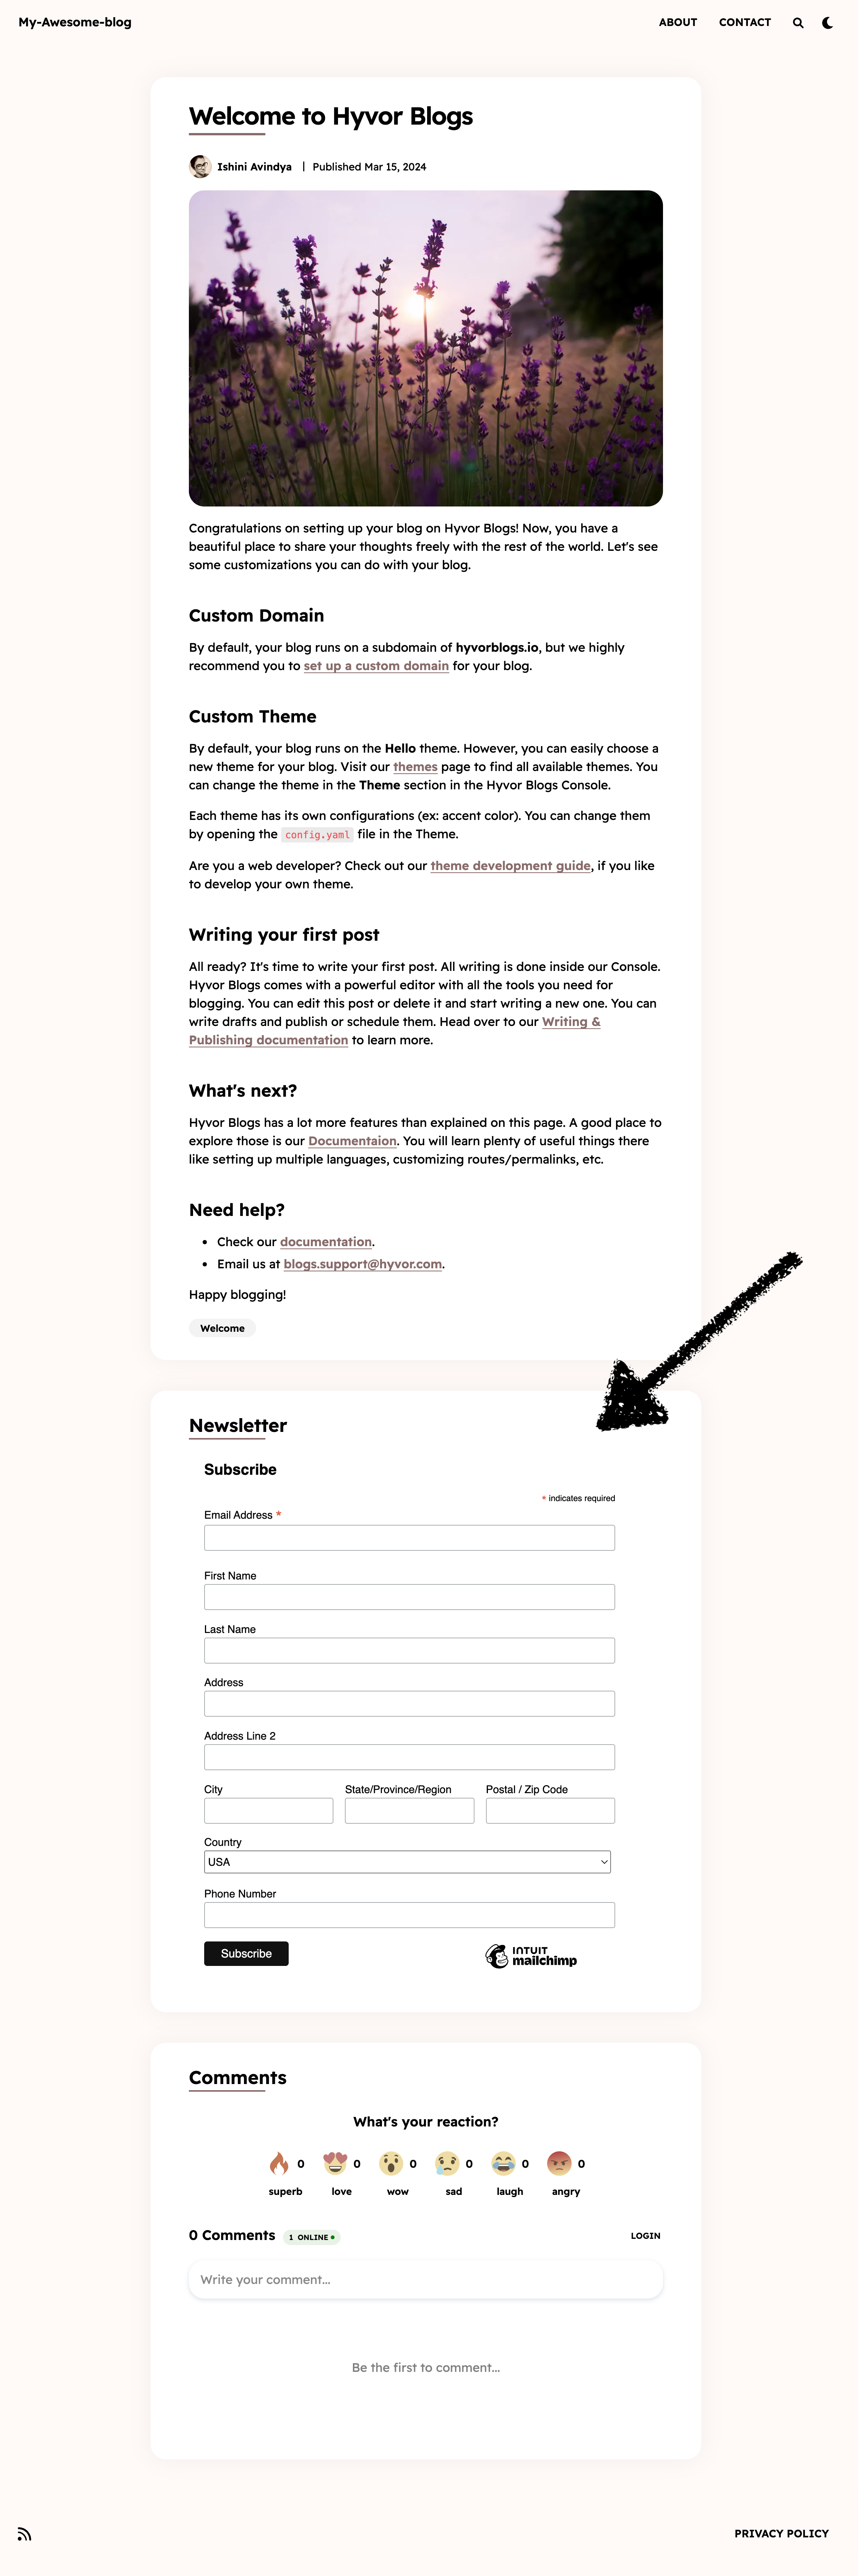
Warning: Please note that the location of the form may vary depending on the template employed by your blog. For instance, the form appears on the post pages in the Hello theme. To specify the desired placement for the subscription form, kindly refer to the section below.
If the signup form location used by your blog's template does not fit your need, you can edit the theme to customize the location.
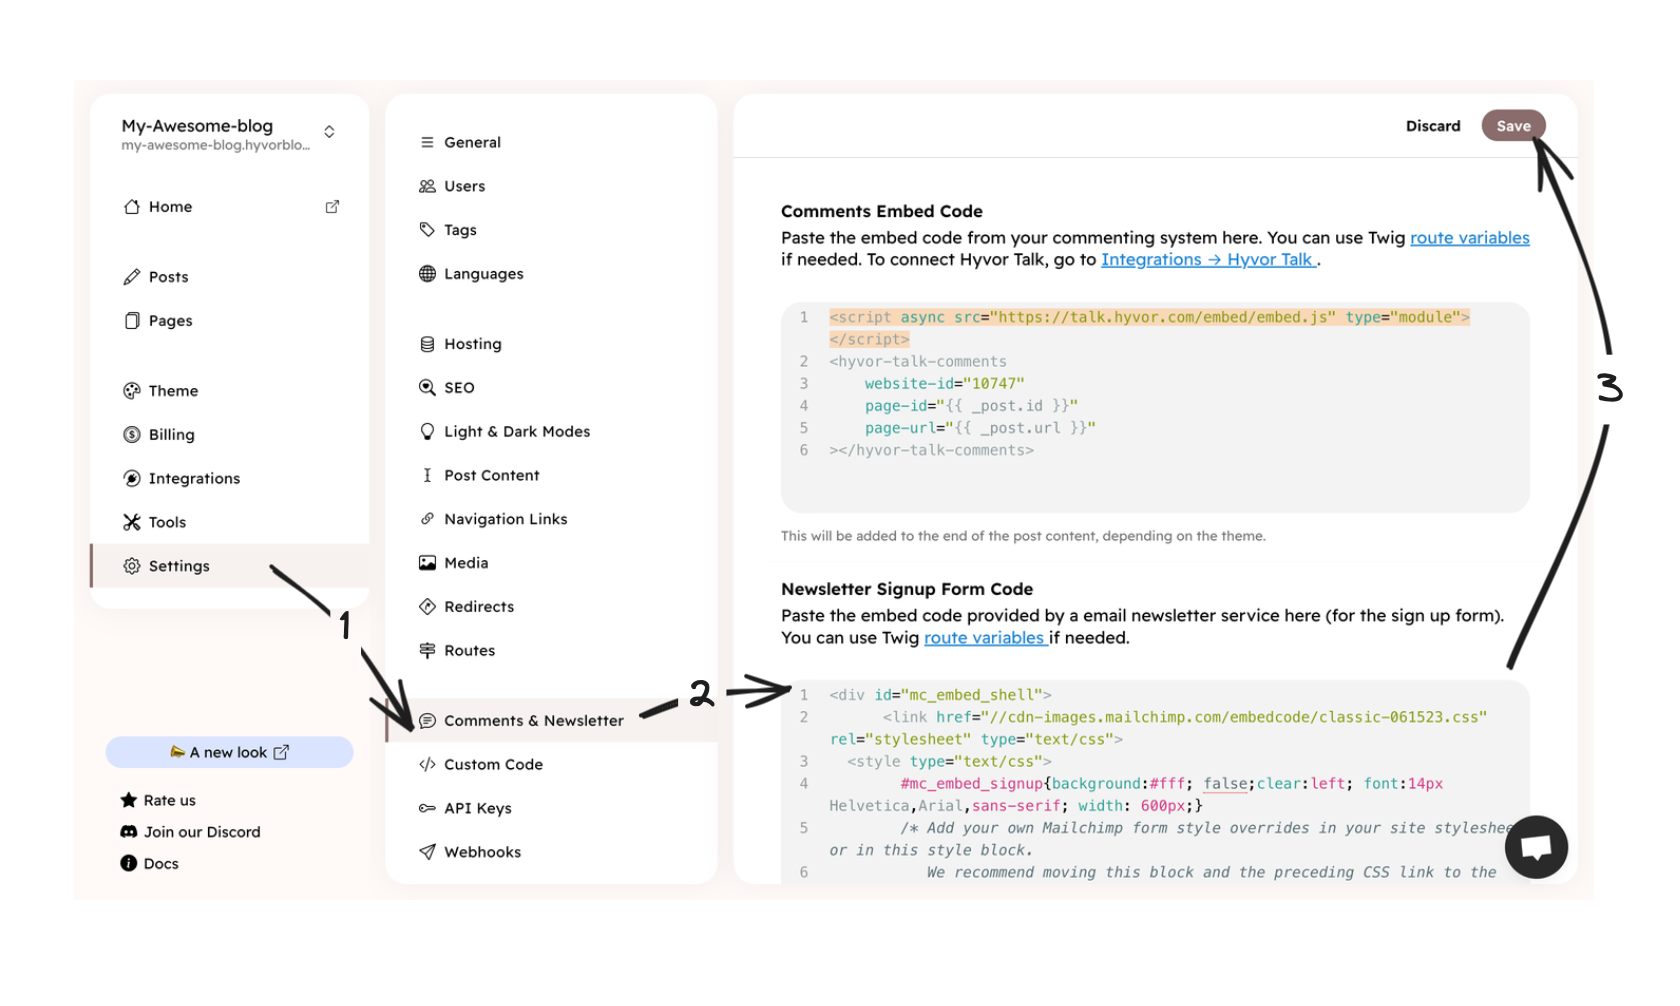
index.twig: The form will be displayed on the home page._footer.twig: The form will be displayed in the footers of all pages.MAILCHIMP_CODE_SNIPPET with the code snipped provided by Mailchimp when editing your form.<center>
MAILCHIMP_CODE_SNIPPET
</center> This way, you can customize where to put the subscription form. Note that you can put it in multiple places.