Step 1 - Google Analytics account setup
If you already have a Google Analytics account, skip to Step 2.
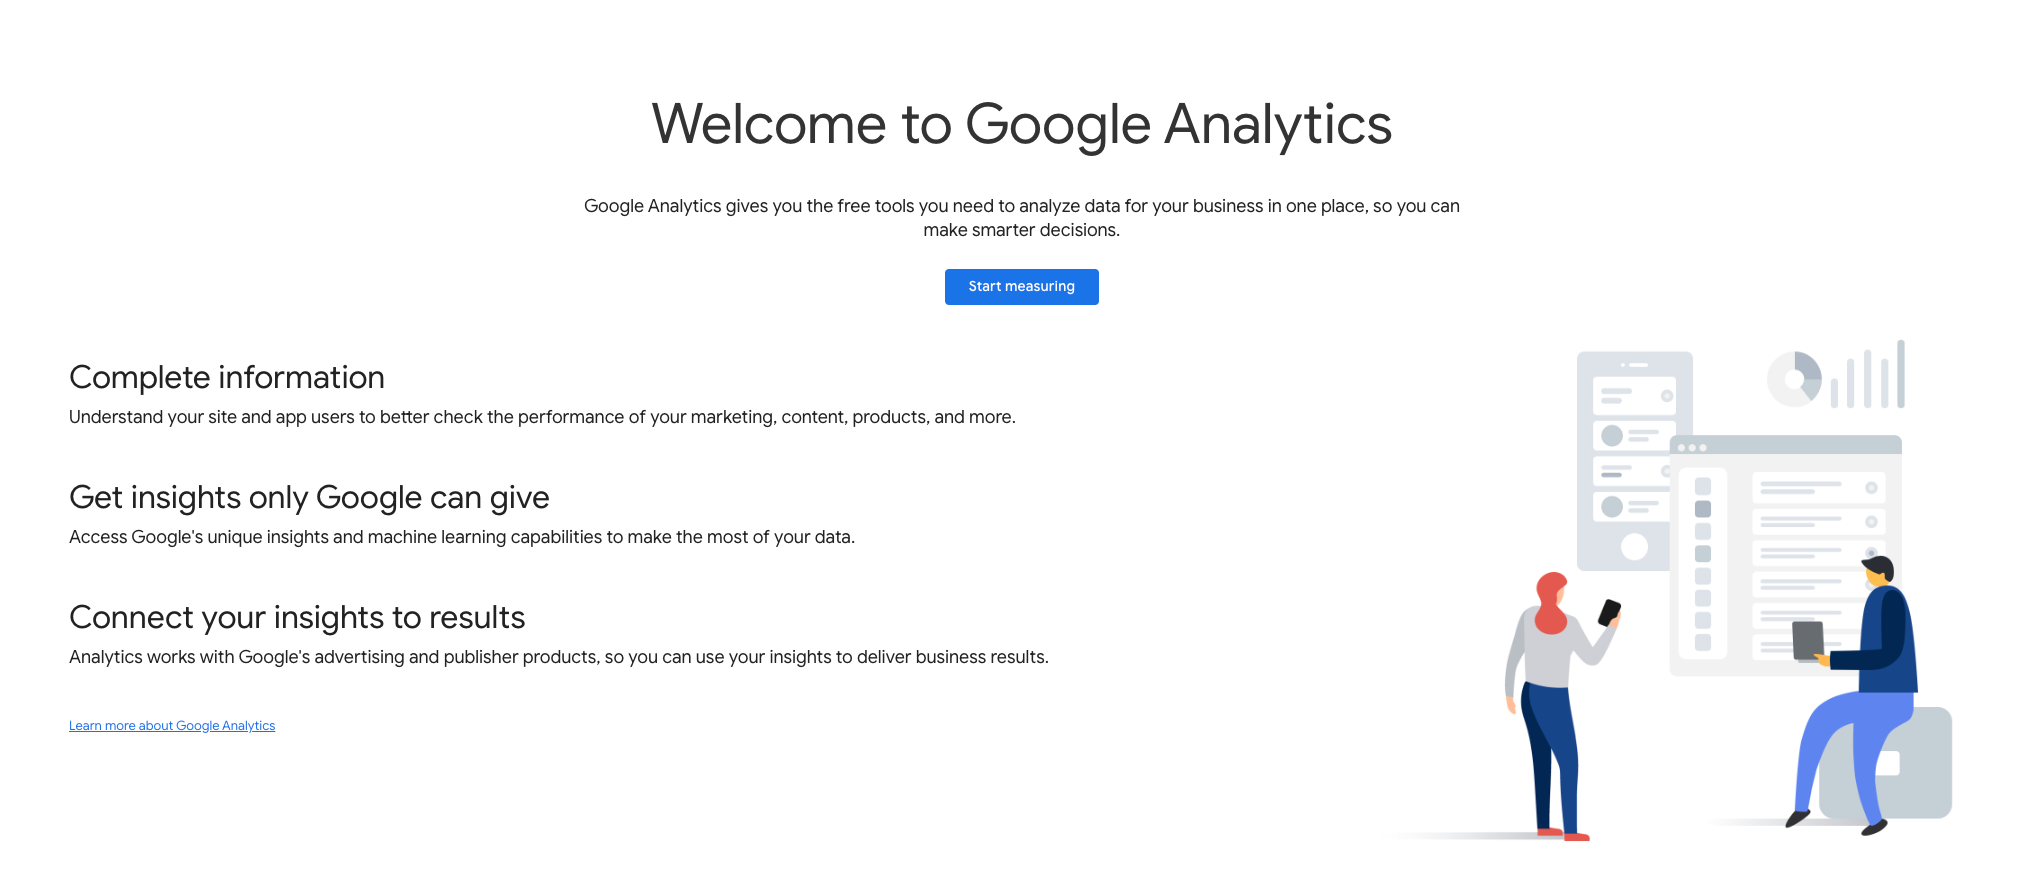
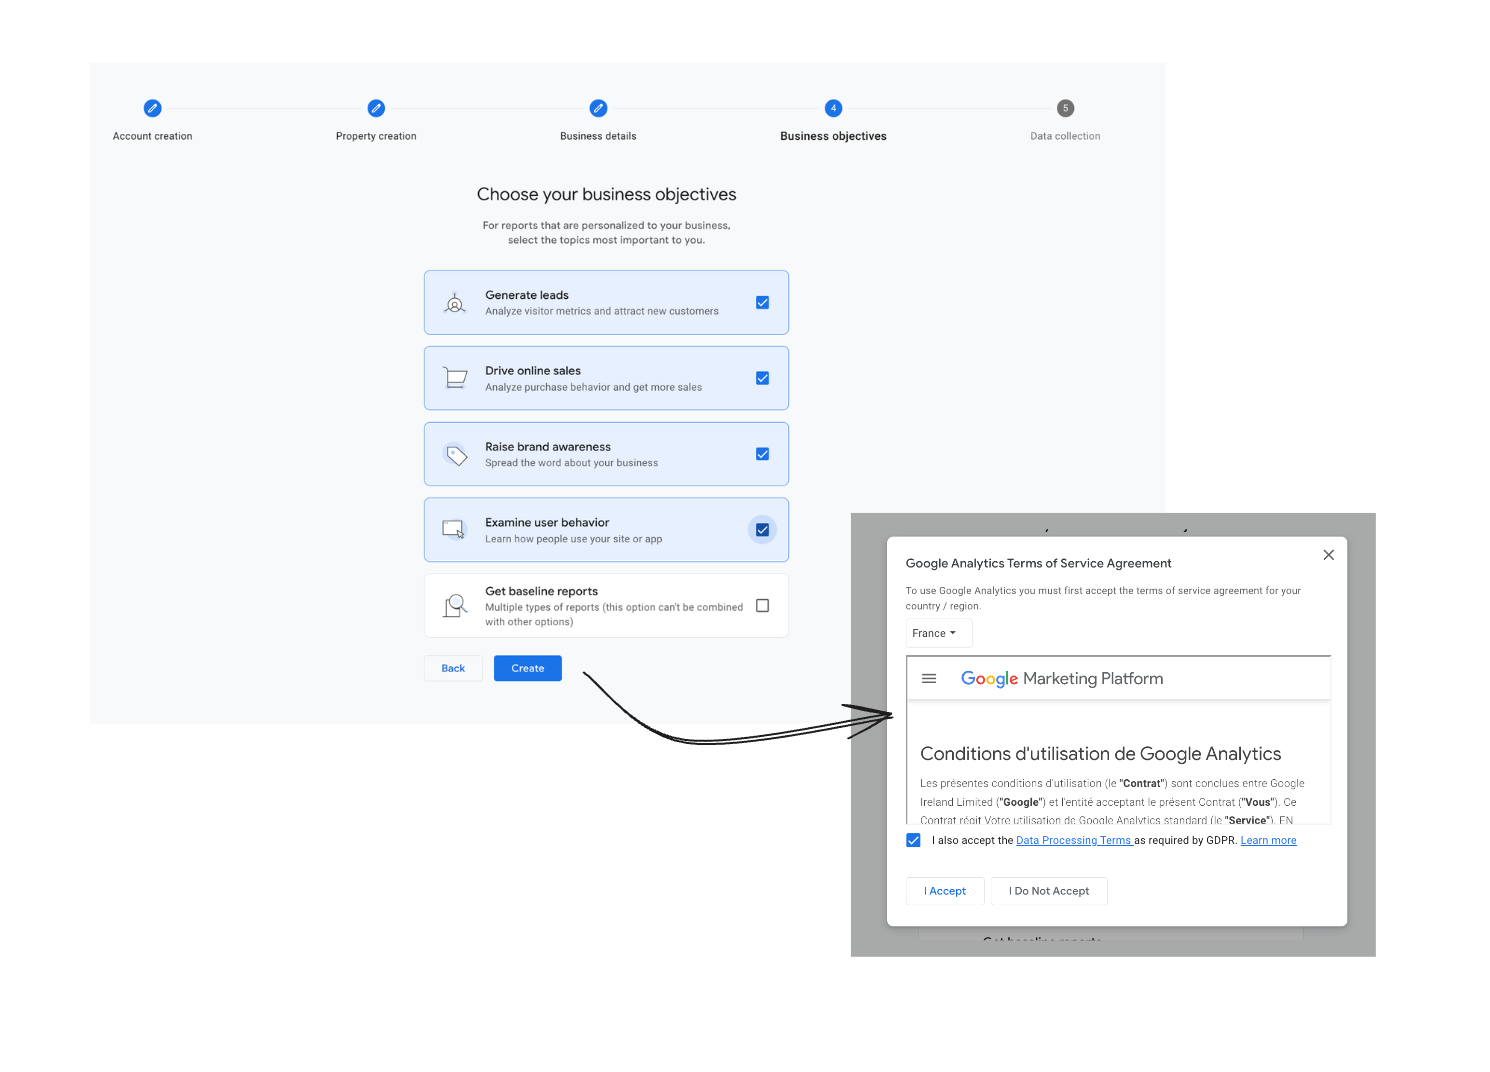
- Sign in to your Google account and go to Google Analytics. Then click Start Measuring.
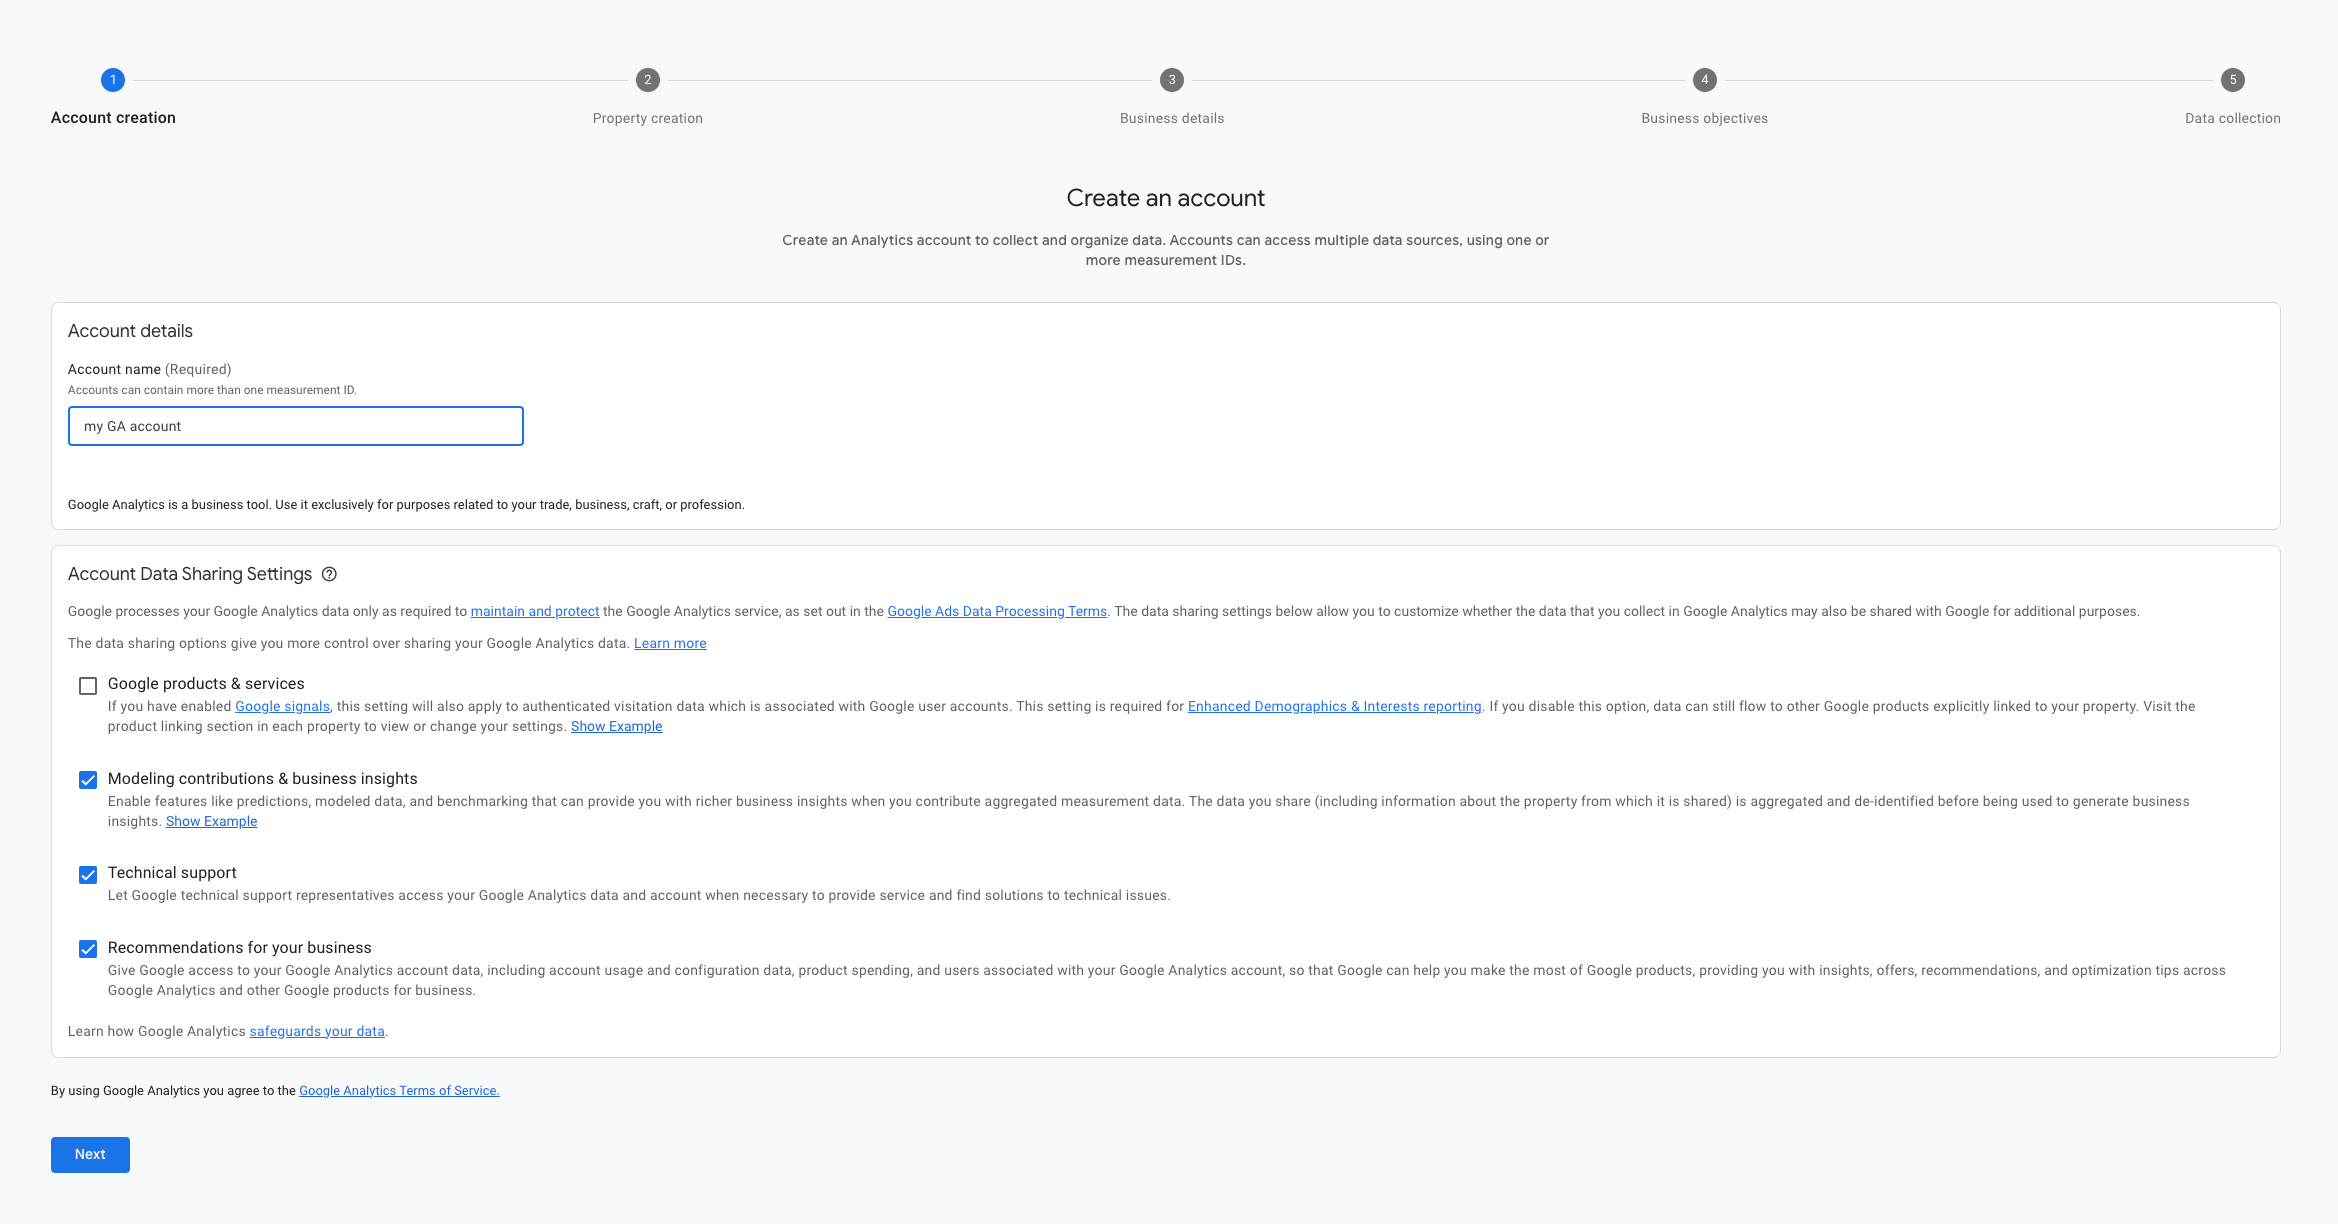
- Choose a name for your account, you can use the same one as your Hyvor account.
- Select or unselect the data-sharing parameters according to your needs. Then click "Next".
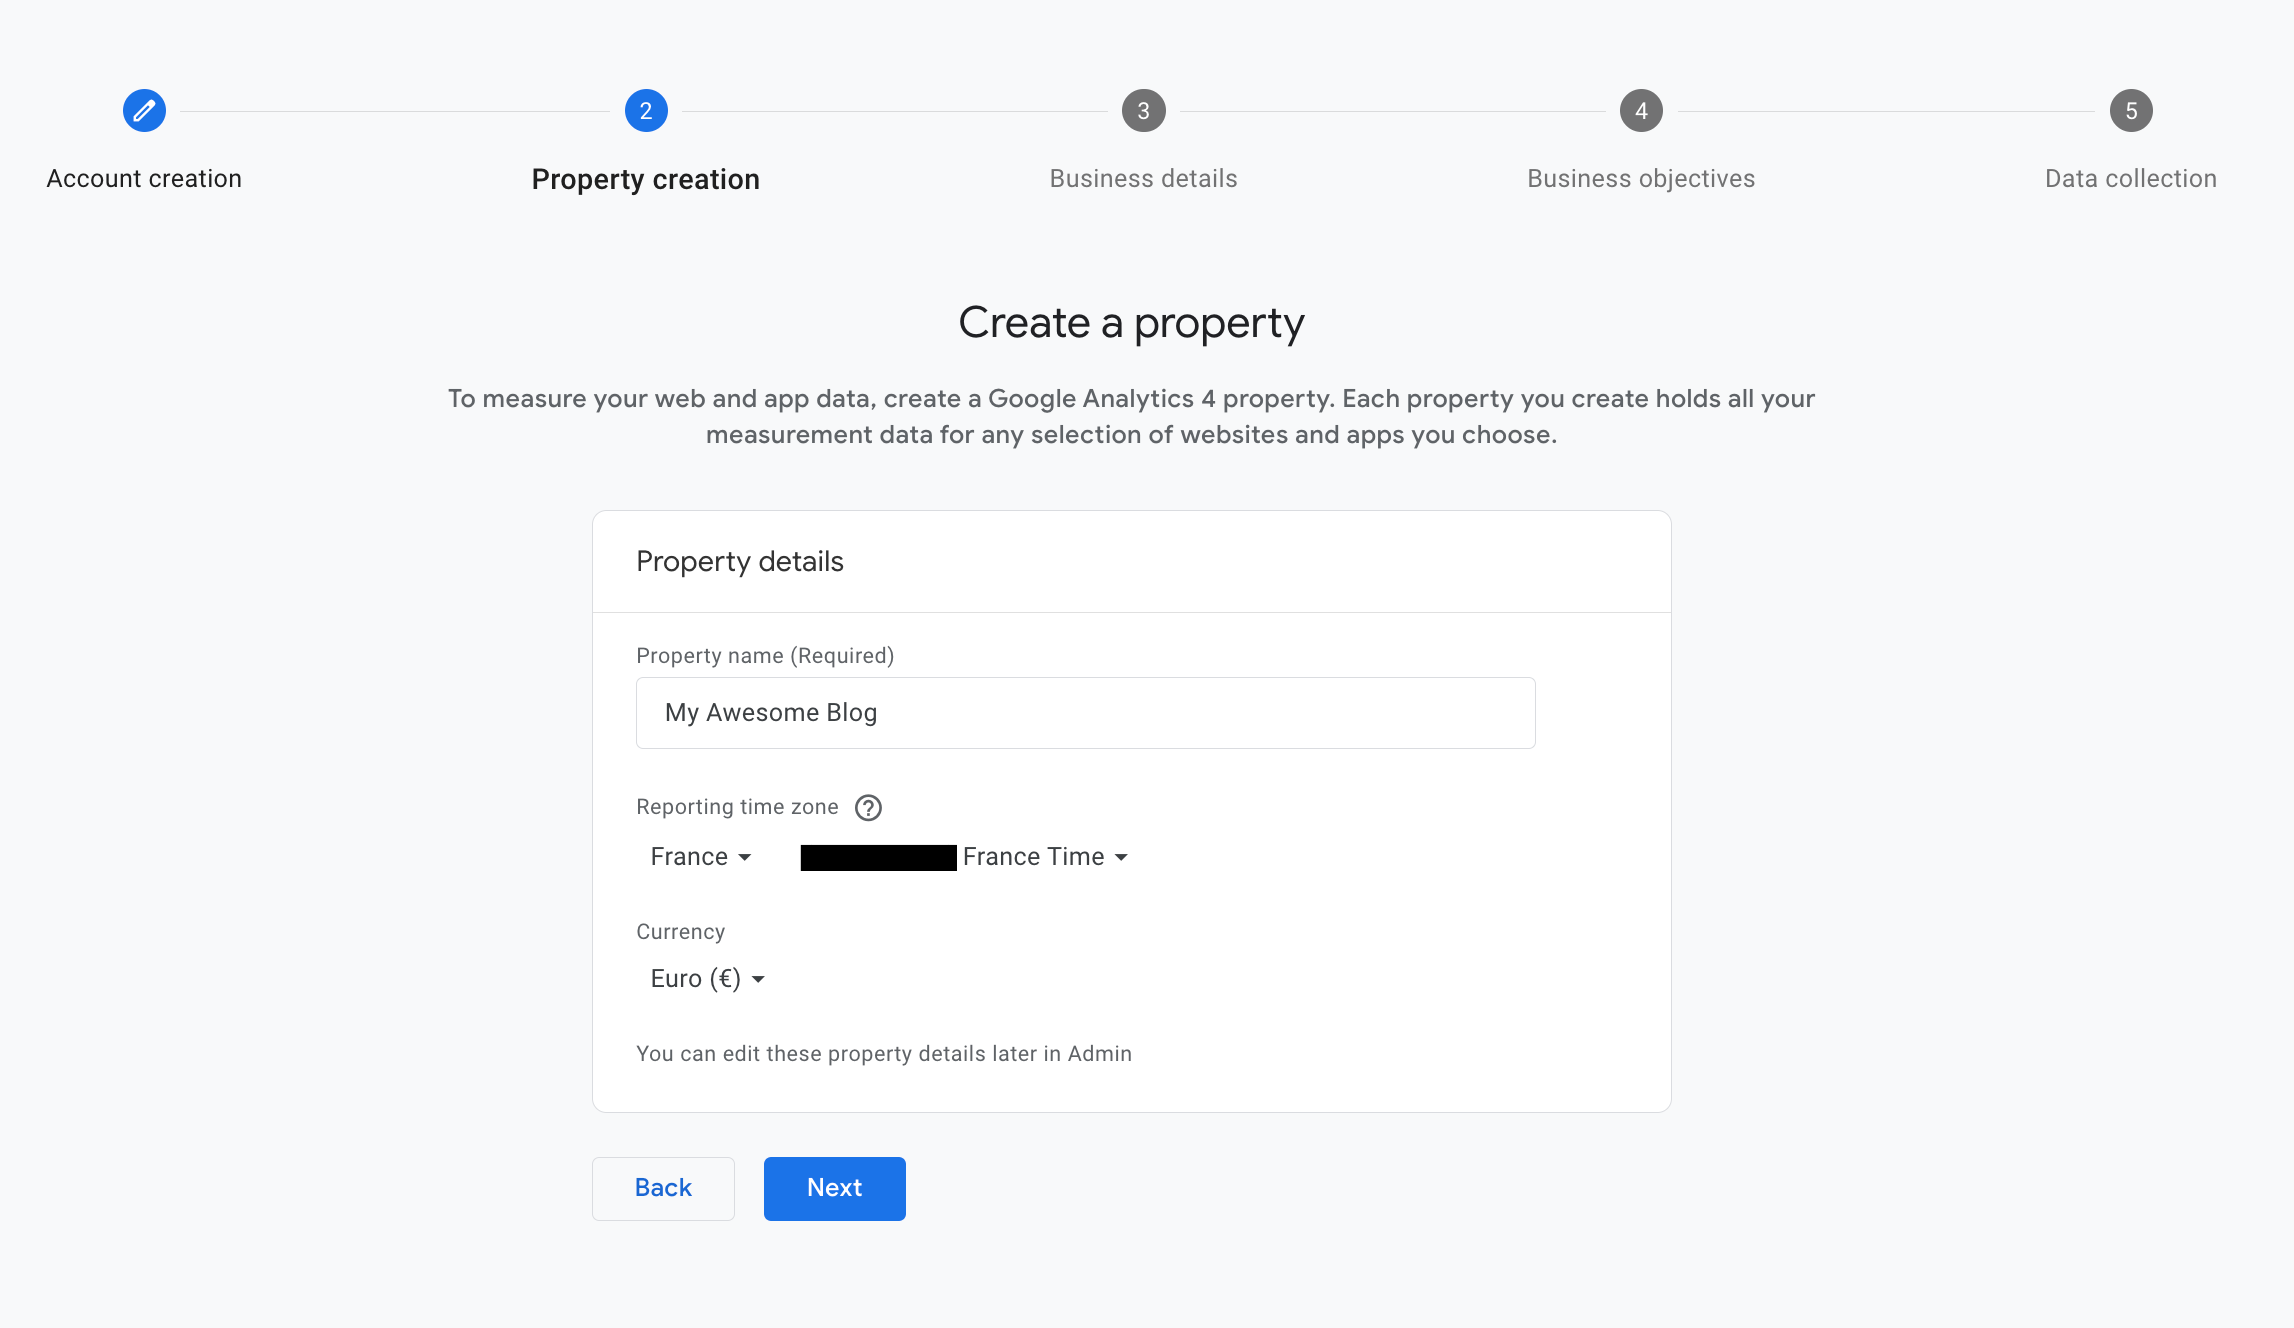
- Choose a name for your Google Analytics property. Since a property represents a business's web
and/or app data you can use the name of your blog.
- Select the time zone and the currency of your country. Click Next.
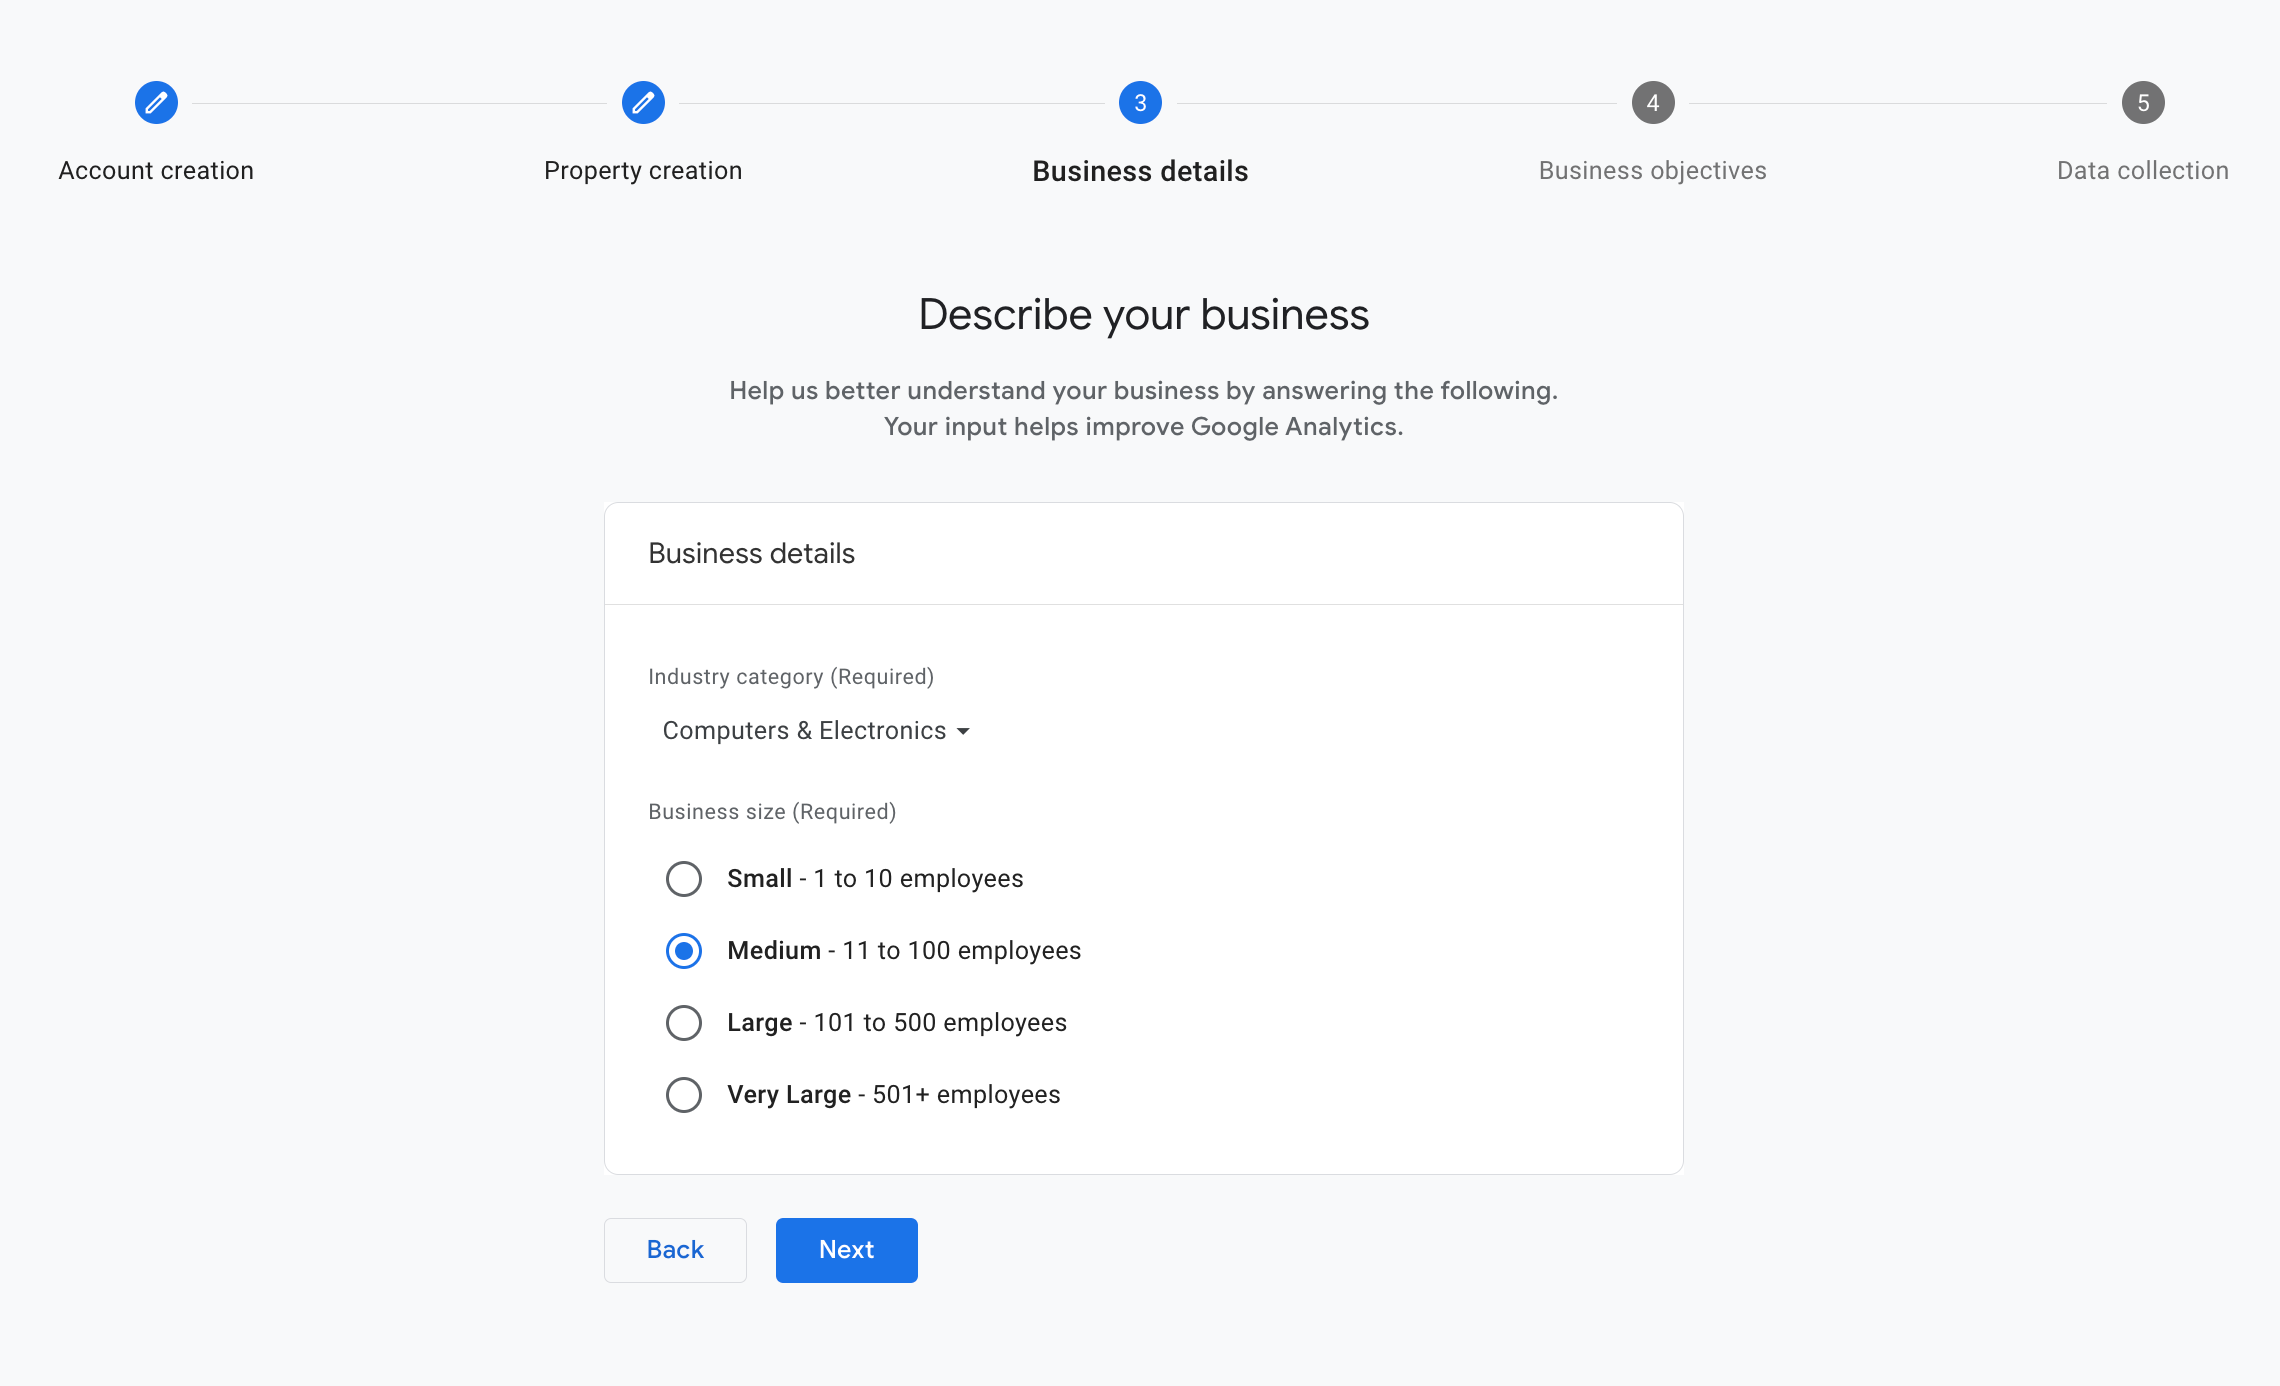
- Fill in your business information according to your blog. Then click Create.
- Choose the business objectives that you want to achieve with your blog. Then click Create. After that you will see Google Analytics Terms of Service Agreement, make sure to accept
that.
Step 2 - Create a data stream
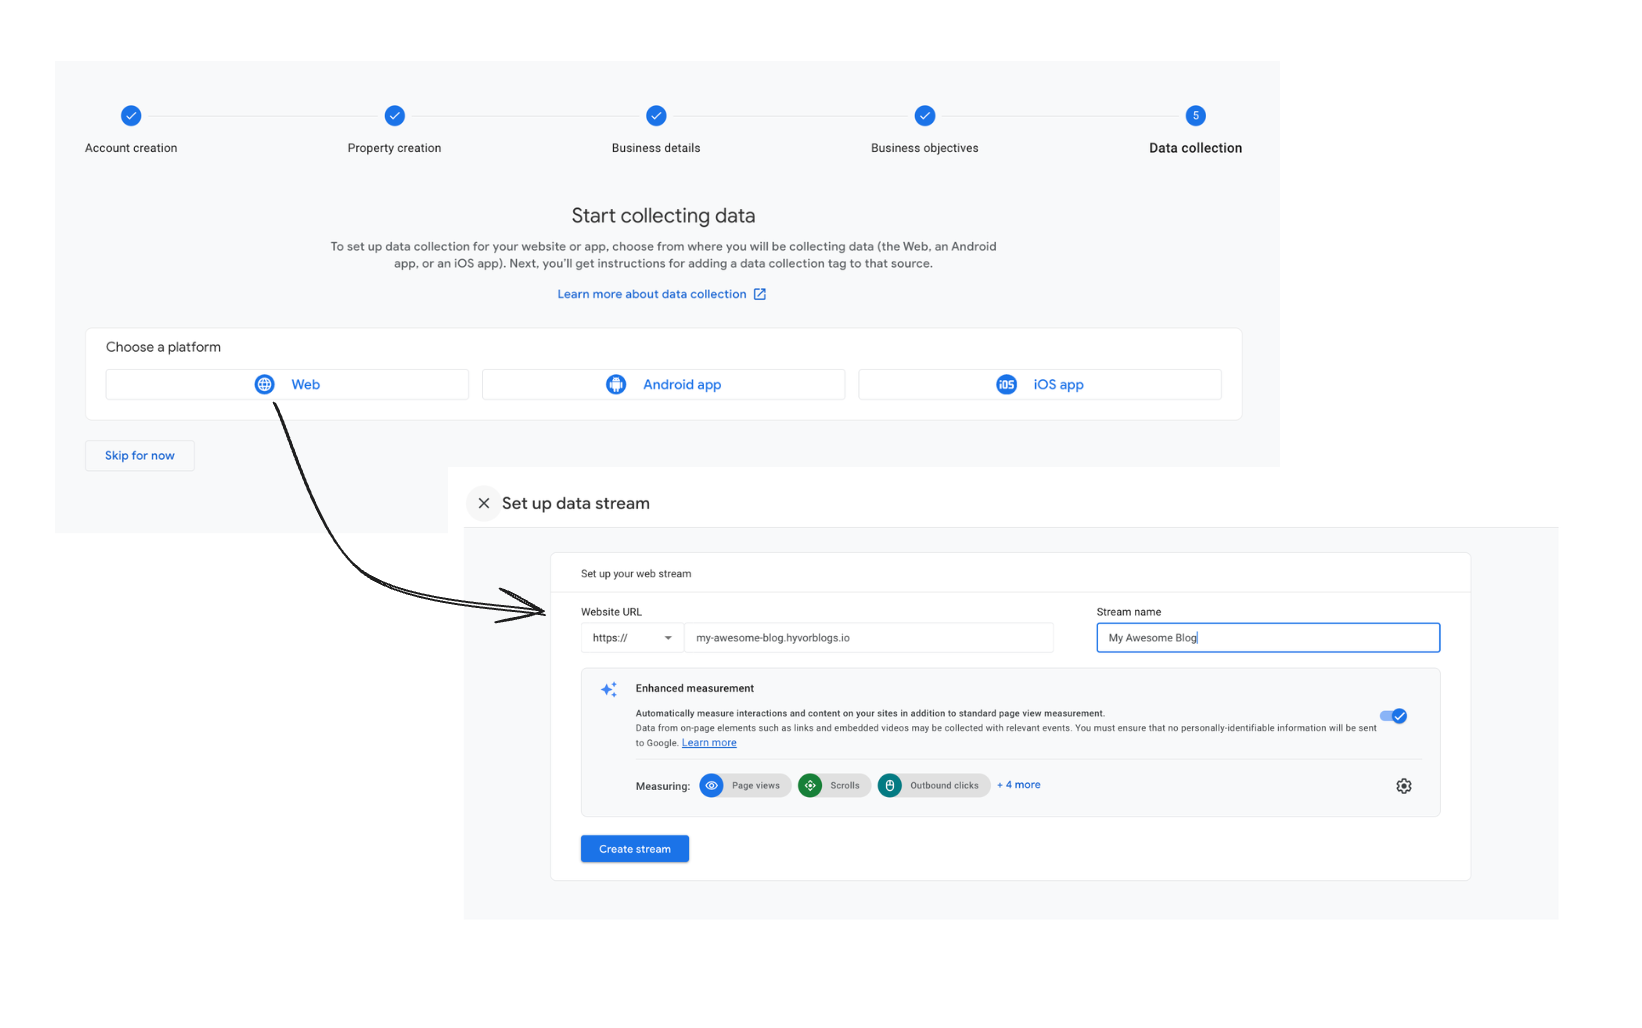
After you accepted Google Analytics Terms of Searvice Agreement, you will be directed to
creating a data stream step.
- Choose Web among the given data streams.
- Enter the URL of your website, and use your blog URL (ex:
myawesomeblog.hyvorblogs.io or myawesomeblog.com), and the name for the stream, and use the name of your blog
(My Awesome Blog). - Click Create stream.
Step 3 - Linking the Google Analytics data stream with your blog
Now the data stream creating is finished, you'll need to link it to your blog.
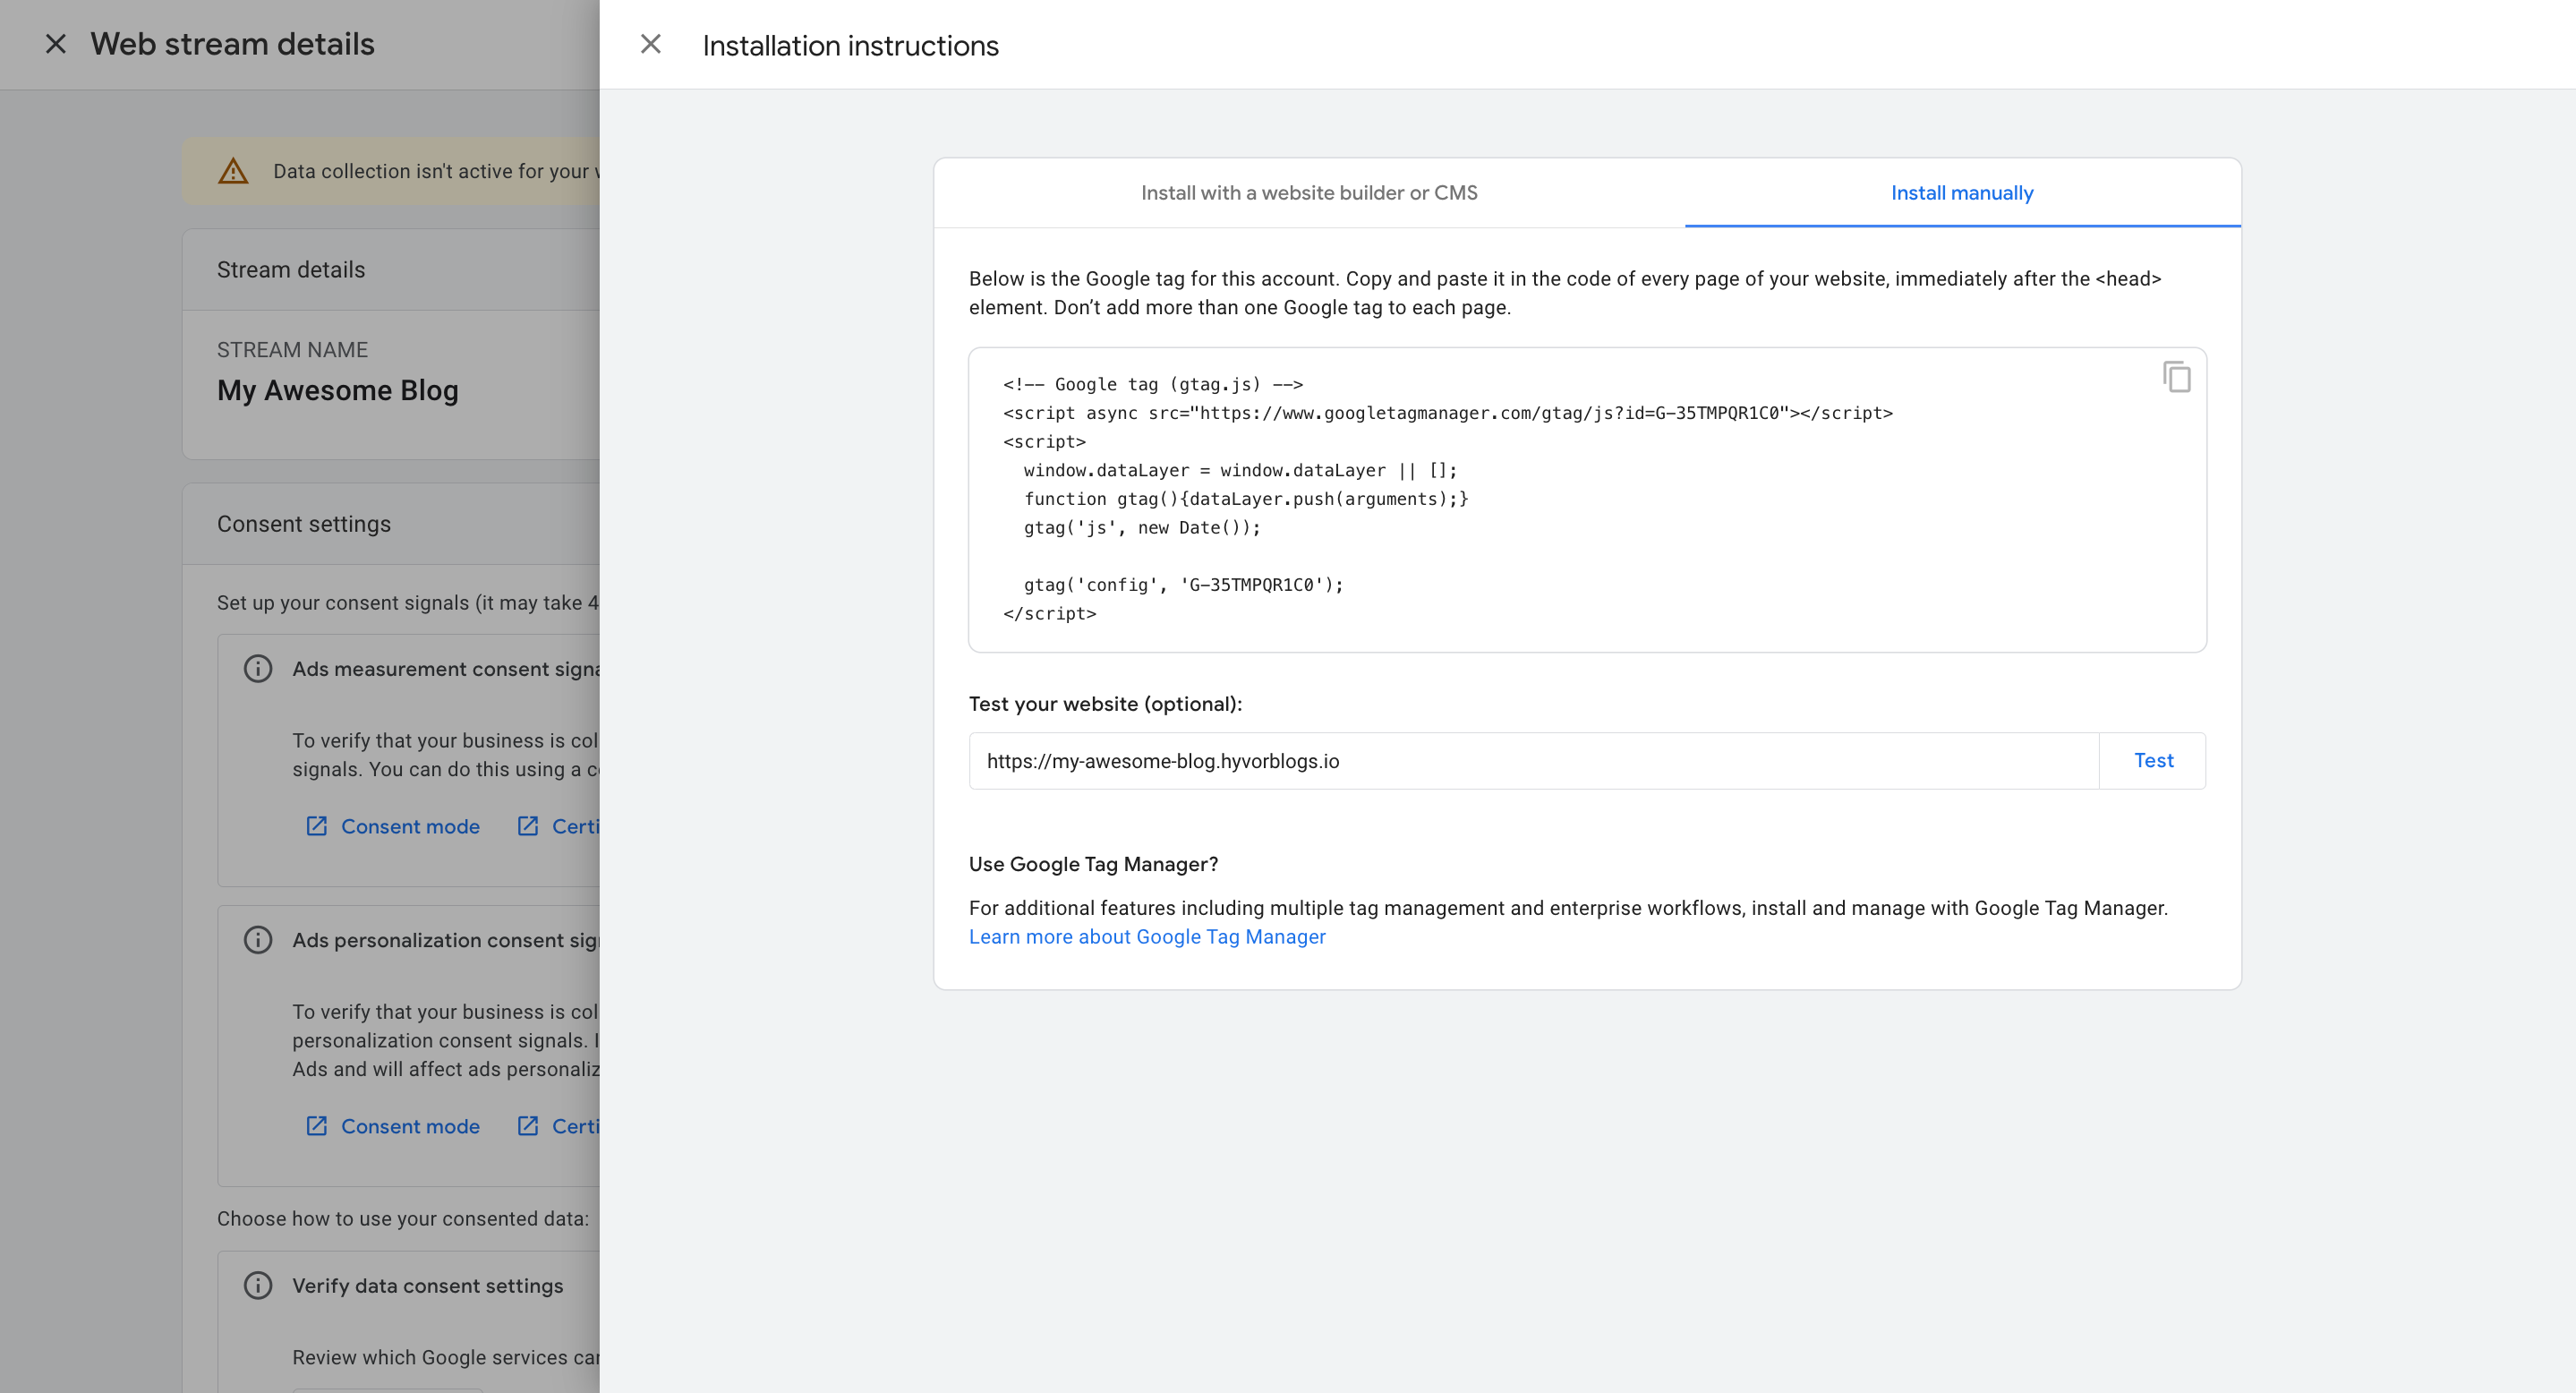
- A popup should open with the installation instructions (if not click on View tag instructions).
- Copy the code snippet provided by clicking on the Copy icon in the top right corner.
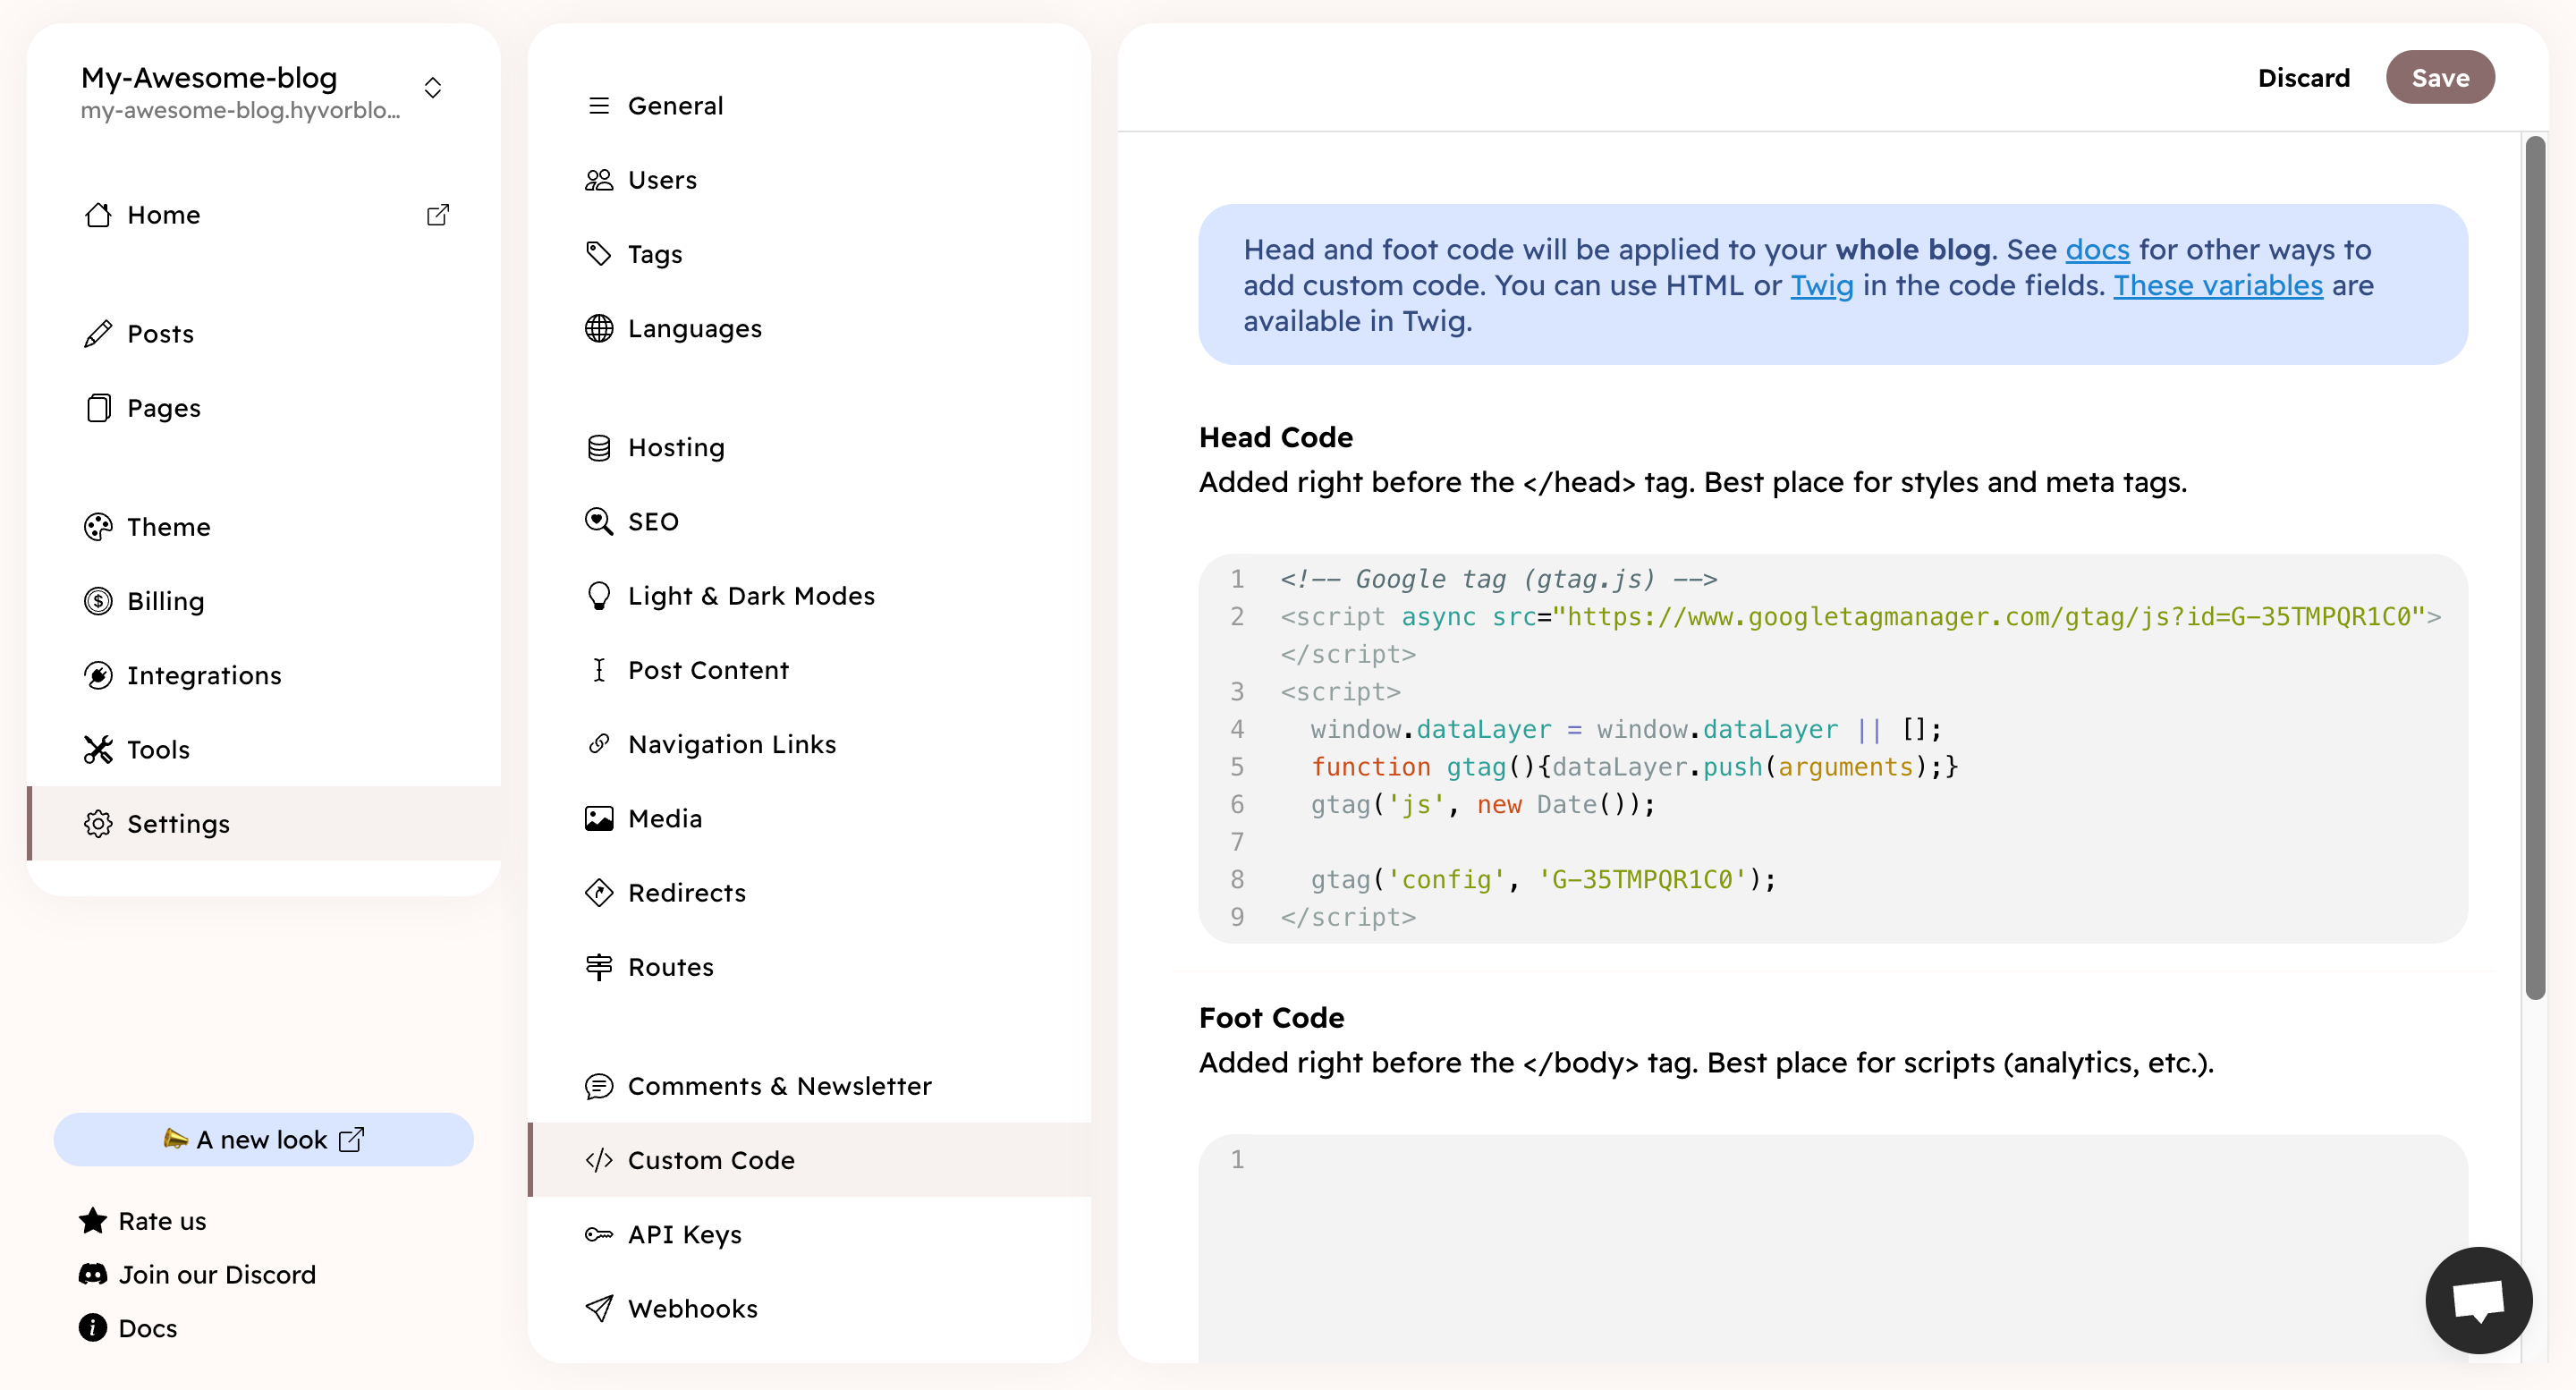
- In your blog console go to Settings → Custom code.
- Paste the code snippet in the Head Code section and hit Save.
This way, Google Analytics will be implemented on all the pages of your blog.
It may take up to 24 hours for Google Analytics to start showing data.
Step 4 - Verify the installation
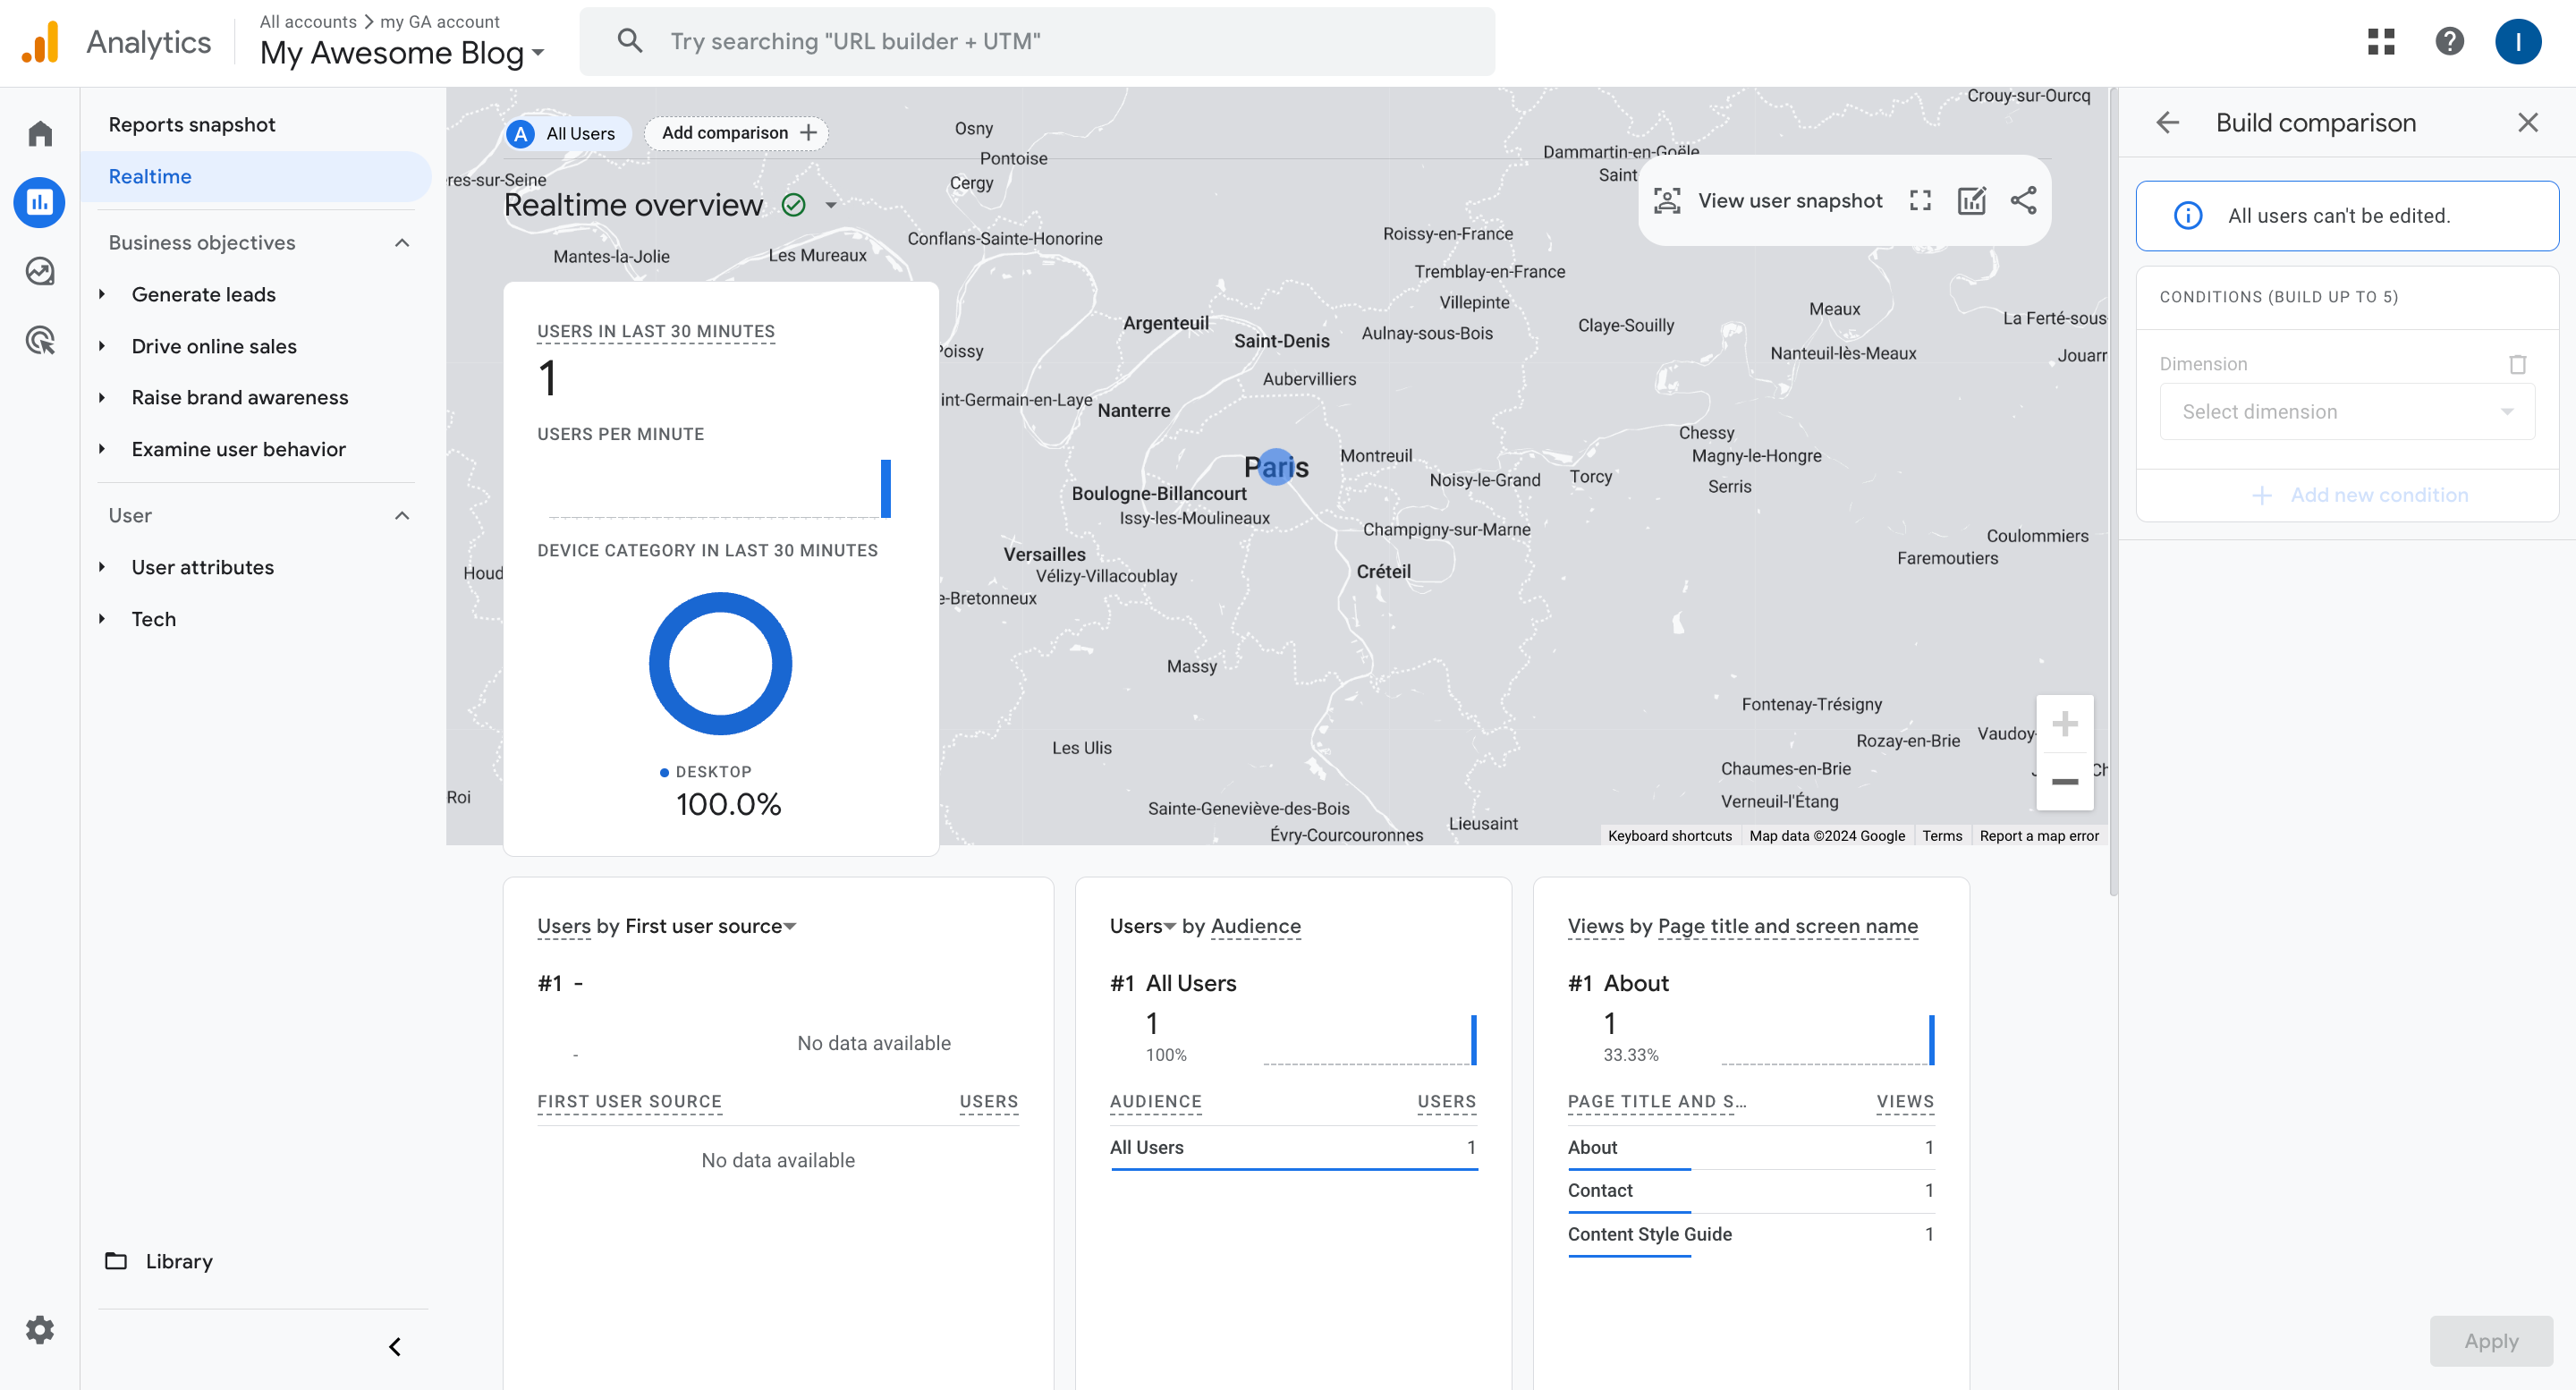
After you've installed the code snippet, you can verify the installation by going to the Google Analytics and clicking on the "Realtime" tab. Then go to your blog and you should see a user in the Realtime tab.
 +
+ 
